


34
PREPARATIONS FOR OPERATION
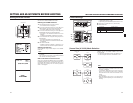
Turning the Power ON
Turning the Power ON
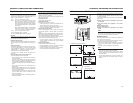
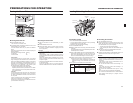
1.Set the POWER switch to ON.
The unit turns on in Camera mode.
The operation differs according to whether the unit is in the
Camera mode or in the VTR mode.
The mode switches each time you press the CAM/VTR
button.
When the mode is switched, the VTR indicator displays the
following statuses.
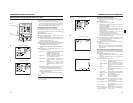
Camera mode
The GY-HD100 enters the Camera mode. The camera
image is displayed in the viewfinder or on the LCD monitor.
When a recordable videocassette is loaded, the GY-HD100
enters the record-standby mode automatically. “STBY” is
displayed in the VTR operation mode indication area of the
LCD monitor or in the viewfinder. In this condition, press
the REC/VTR trigger button to start recording.
*Playback is also possible in the Camera mode.
Playback operation becomes possible when the STOP
button is pressed to set the VTR operation mode indica-
tor to indicate “STOP”.
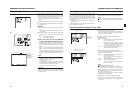
VTR mode
The GY-HD100 enters the VTR mode. The camera image
will not be displayed in the viewfinder or on the LCD moni-
tor. When a videocassette is loaded, the GY-HD100 enters
the stop mode.
“STOP” is displayed in the VTR operation mode indication
area of the LCD monitor or in the viewfinder.
HDV/DV input is possible through the IEEE1394 connector.
(GY-HD100U/GY-HD101E only)
Turning the Power OFF
1.Place the GY-HD100 in the record-standby or STOP
mode.
2.Set the POWER switch to OFF.
3.Remove the battery pack or the power supply to the DC
IN connector. (When the camera is not going to be used
for a longer period.)
CAUTION
•Do not set the POWER switch to OFF while recording is
taking place.
Confirm that the “STBY” or “STOP” indication is shown in
the VTR operation mode indication area before the power
is turned off.
Should the POWER switch accidentally be set to OFF
during a recording, wait at least 5 seconds before turning
the power on again.
•Always set the POWER switch to OFF before disconnect-
ing the power supply.
Do not turn the battery pack or AC power supply OFF
while the POWER switch on the camera is still set to ON.
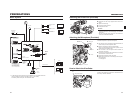
VTR
CH-1 BOTH CH-2
MONITOR SELECT
DISPLAY
ON OFF
FULL AUTO
ProHD
US
ER
3
US
ER
2
US
ER
1
S
TAT
US
MEN
U
S
H
U
TTE
R
2
1
OFF
ND FILTER
REC
OFF
ON
POWER
VF BRIGHT
WHT.BAL
A
U
T
O
A
U
DI
O
LEVEL
A
U
T
O
C
H-
1
C
H-
2
CH-2
CH-1
-
+
AUDIO SELECT
MANU
AUTO
TC
LCD BRIGHT
DISPLAY
TC
UB
FREE
REGEN
GENE.
REC
CAM/VTR
VTR indicator
POWER switch
CAM/VTR button
While the mode is being switched : Flashing
In VTR mode : Lit
In Camera mode : Off
35
PREPARATIONS FOR OPERATION
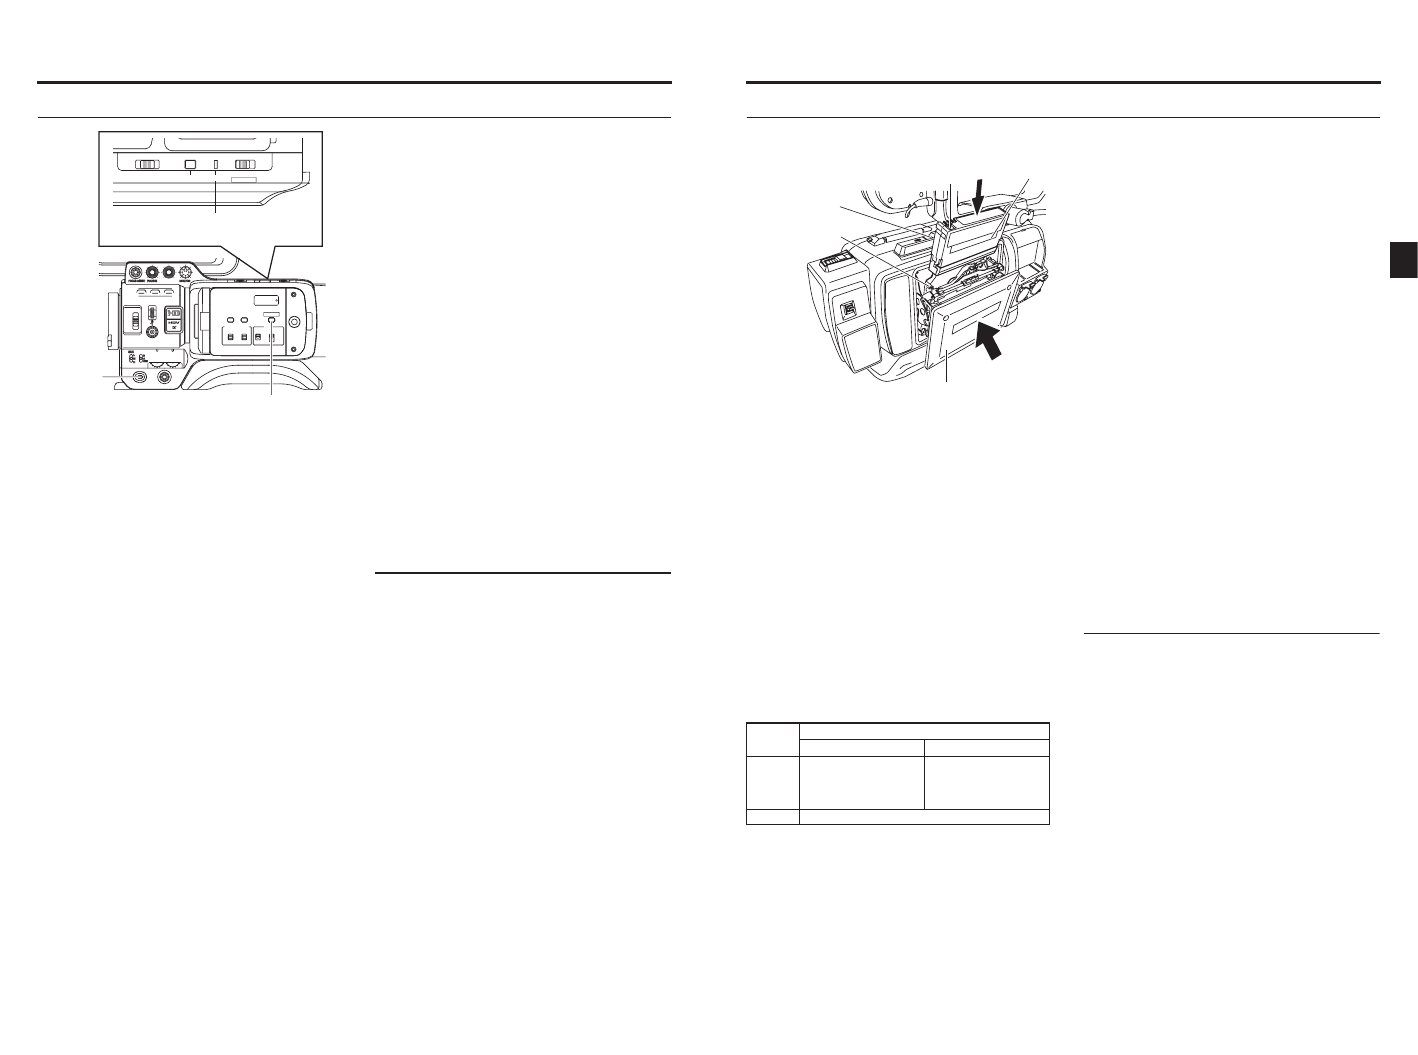
Loading/Unloading the Cassette
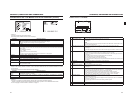
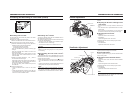
Cassette Loading
Use a videocassette tape marked MiniDV.
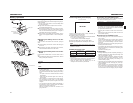
•To record, slide the switch on the back for use in preventing
accidental erasure to the “REC” side.
•Remove any the tape slack before loading.
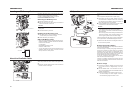
1.Turn the POWER switch ON.
2.Slide the EJECT switch on the top panel of the camcorder
to the side.
The videocassette cover opens automatically and a video-
cassette tape can be inserted.
3.Insert a videocassette tape into the videocassette holder.
With the tape window facing out, move the switch on the
back of the videocassette up and firmly push the center
back of the videocassette straight in as far as it will go.
4.Carefully push the center of the videocassette cover in the
direction of the arrow as far as it will go to close it.
•After the cover is closed, it takes about 10 seconds until
recording can begin or the camcorder can enter stop
mode.
If the power is on, the modes are as shown below.
Unloading the Cassette
1.Turn the POWER switch to ON.
2.When the camcorder is in shooting standby mode or stop
mode, slide the EJECT switch to the side and wait until
the videocassette cover opens completely.
•The LED next to the EJECT switch flashes.
A few seconds pass before the videocassette tape is
ejected.
3.The LED turns off and the videocassette cover opens.
•Take out the videocassette tape.
4.Carefully push the center of the videocassette cover in the
direction of the arrow as far as it will go to close it.
CAUTION
•When you close the videocassette cover, push it in firmly
as far as it will go. If the videocassette cover is not closed
properly, it becomes half-locked and the camcorder can-
not function.
If this happens, firmly push the videocassette cover in
again as far as it will go to lock it.
•Do not slide the EJECT switch while recording is in
progress.
If you slide the EJECT switch while recording is in
progress, the tape is ejected.
•Do not leave the videocassette cover open for a long
time.
Dust or dirt may enter the inside and cause damage.
•Do not touch the videocassette cover or interfere with the
eject operation while ejecting is in progress. This will
cause damage.
REC/SAVE
switch
Tape window
EJECT switch
Cassette holder
Cassette cover
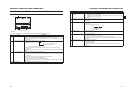
MODE
REC/SAVE switch
REC SAVE
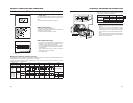
Camera Record-standby mode STOP mode
REC INHIBIT is displayed
on the LCD monitor and in
the viewfinder.
VTR STOP mode