


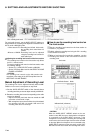


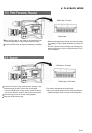

7. SHOOTING OPERATION
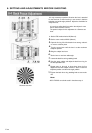
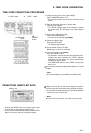
Viewfinder
VCR operation
status display
STBY
or
SAVE
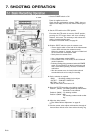
When a recordable videocassette is loaded, the GY-DV500
enters the record-pause mode. However, the record-pause
operation condition differs depending on the setting of the VTR
switch.
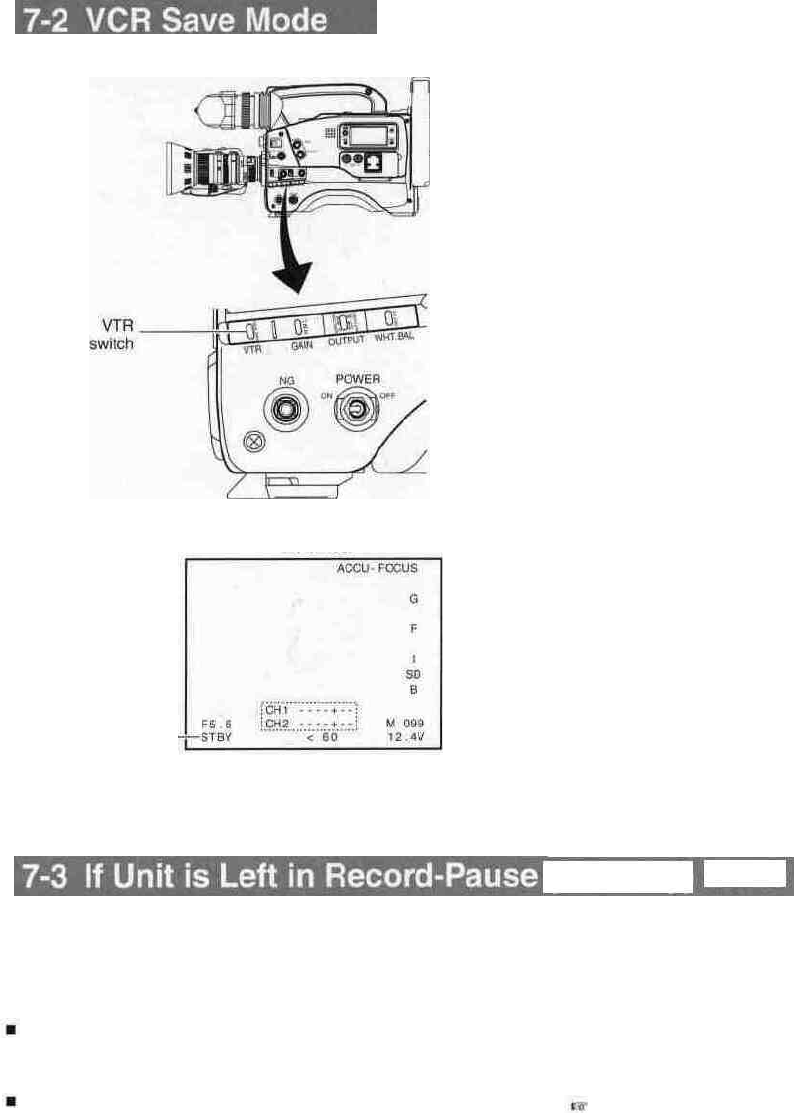
• VTR switch setting
STBY : The GY-DV500 enters the record-pause mode, and
the drum is rotating at this time. (Standby mode)
The "STBY" indicator appears in the VCR operation
status display in the viewfinder (in Status 1 mode).
• In this condition, recording starts immediately when
the VTR trigger button is pressed.
SAVE : The GY-DV500 enters the record-pause mode but
the drum is not rotating. (Save mode).
The tape is protected.
The "SAVE" indicator appears in the viewfinder (in
Status 1 mode).
The OPERATE indicator lights orange. The display
backlight turns off.
- CAUTION:
When the VCR Setup Menu item No. 396 SSF MODE is
set to the CUE MODE or MARK mode, the VCR save
mode is not entered.
Recording from the Save mode
• In the save mode, pressing the VTR trigger button will start
recording.
However, in this case, it takes several seconds before the
GY-DV500 starts recording.
• Pressing the VTR trigger button again interrupts the recording
and the GY-DV500 enters the save mode again.
(Status 1 mode)
(Standby) Mode
When the GY-DV500 has remained in record-pause (standby)
mode for about 30 minutes, the unit enters the save mode, in
which the drum rotation is stopped automatically and the tape
tension is released. (Save mode)
To start recording from the save mode, press the VTR trigger
button; the drum starts to rotate and recording starts in about
3 seconds.
To return to the record-pause mode from the save mode,
press the VTR trigger button TWICE; the drum starts to rotate.
• The time until the unit enters the save mode after it is
placed in record-pause mode can be set to 3 minutes or
30 minutes with the VCR Setup Menu item No. 307 LONG
PAUSE TIME.
When used in a cold environment, the setting will be 3
minutes regardless of the setting on the VCR Setup
Menu.
See page 69.
E-52