


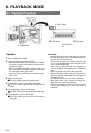

8. PLAYBACK MODE
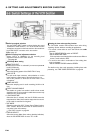
2.
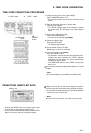
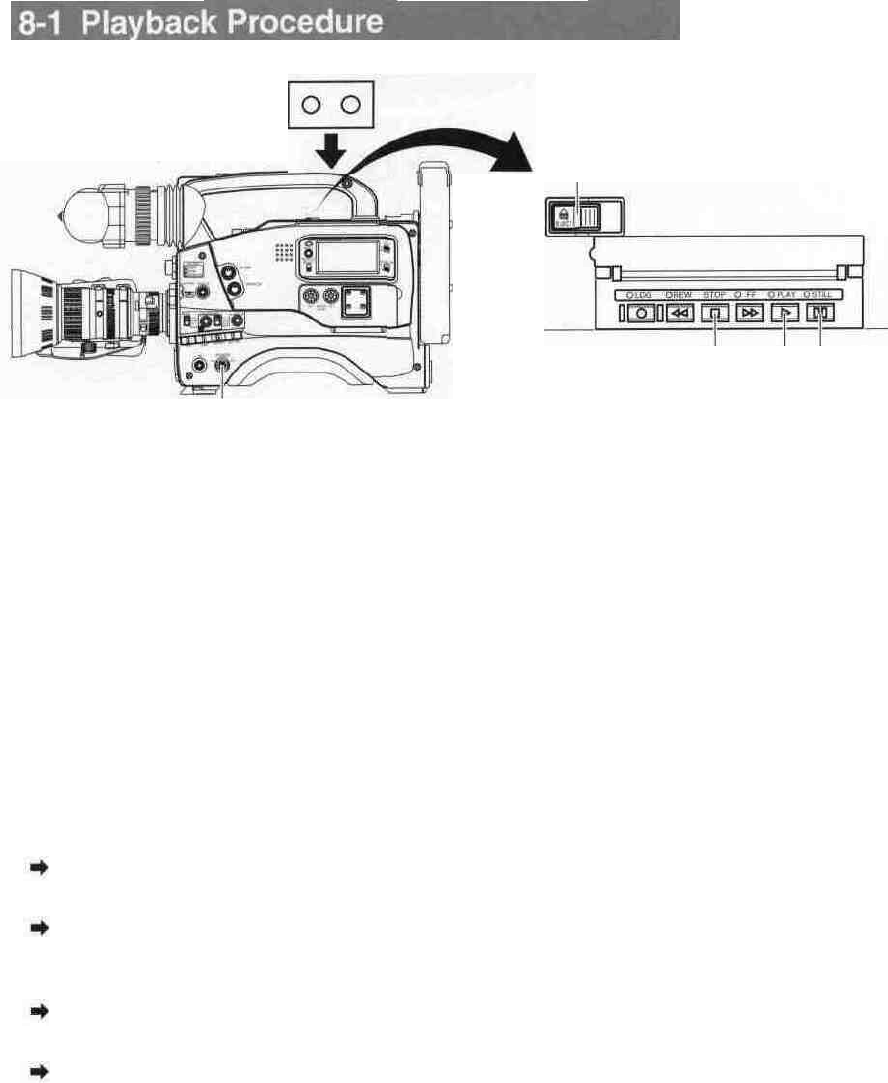
2. EJECT switch
4.
STILL button
6.
STOP button -
3.
5.
PLAY button
1.
POWER switch
Operation
Set the POWER switch to ON.
Load the recorded videocassette correctly.
• Slide the EJECT switch to the side. When the cassette
cover opens, insert the videocassette and then close the
cassette cover again.
• When a recordable videocassette (with the switch on the
back of the cassette set to REC) is loaded, the unit enters
the record-pause mode (STBY mode).
In this case, press the STOP button to release the record-
pause mode.
Press the PLAY button.
The PLAY indicator lights and playback starts.
Press the STILL button to stop playback temporarily.
The STILL indicator lights and the unit enters the still
mode.
To re-start playback, press the PLAY button.
To stop playback, press the STOP button.
The PLAY indicator goes out and the unit enters the
stop mode.
CAUTION:
• When the still picture mode or stop mode has continued
for about 30 minutes, the unit automatically switches to
the save mode to protect the tape.
The time until the tape protect mode is initiated can be
set to 3 or 30 minutes with the VCR Setup Menu item
No. 307 LONG PAUSE TIME.
When used in a cold environment, the setting will be 3
minutes regardless of the setting on the VCR Setup
Menu.
• Noise may appear in the picture during still mode.
• When the automatic tracking function is activated at the
start of the playback mode, digital noise may appear on
the playback image.
• This unit does not allow manual tracking adjustment.
• When playing back a tape recorded on another unit,
digital noise may appear during playback.
• Following the loading; the built-in head cleaner will emit
a sound while operating. This does not indicate a
malfunction.
1.
2.
3.
4.
5.
6.
The STILL indicator goes out and playback starts again.
E-54