


40
Shooting
Adjust the white balance according to the color temperature
of the lighting. You can select the adjustment mode
according to the shooting conditions.
As the color of the light (color temperature) varies according to
the light source, it is necessary to readjust the white balance
when the main light source illuminating the object changes.
Manual White Balance Mode (Manual
Switching)
You can select the white balance with the [WHT.BAL.]
selection switch.
Use the [WHT.BAL.] selection switch to select
A
PRESET
B
(preset
mode),
A
A
B
(memory A mode), or
A
B
B
(memory B mode).
Memo :
●
The [FAW] (Fulltime Auto White balance) function can be
assigned to the [A], [B], or [PRESET] button using [Switch
Set...] in the [Camera Function] menu. (
A
Page 74)
●
In [FAW] mode, color temperature of the images is sampled
and white balance is automatically adjusted to the
appropriate level.
●
When [White Balance...] in the [Camera Function]
B
[FULL
AUTO...] menu is set to
A
FAW
B
and the [FULL AUTO] switch
on the camera recorder is set to
A
ON
B
, the mode is fixed at
A
FAW
B
.
ⅥPreset Mode (PRESET)
The color temperature in Preset Mode is set to A3200KB by
default.
The preset color temperature can be changed in [Main
Menu]B[Camera Process]B[White Balance]B[Preset
Temp.]. ((A3200KB or A5600KB) (A Page 79)
Memo :
● The operation to switch the preset color temperature can
be assigned to the [USER1], [USER2], or [USER3] buttons
using [Switch Set...] in the [Camera Function] menu.
(A Page 74)
ⅥMemory A Mode (A), Memory B Mode
(B)
Set to the white balance saved in Memory A or Memory B.
When the [WHT.BAL.] selection switch is set to [A] or [B],
press the [AWB] button to execute white balance. The white
balance will be automatically adjusted and the adjusted
value will be saved in Memory A or Memory B.
1 Prepare the camera recorder.
ASet the [POWER] switch to AONB.
BSet the iris mode switch of the lens to AAB (automatic).
CSet the [FULL AUTO] switch to AOFFB.
2 Set the [ND FILTER] switch according to the lighting
(A Page 43).
3 Set the [WHT.BAL.] switch to AAB or ABB.
4 Locate a place with similar lighting conditions as the
object to be shot, place a white object near the center of
the screen and zoom in to fill the screen with white.
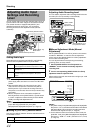
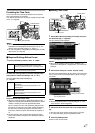
5 Press the [AWB] (Auto White Balance) button.
●
The white detection frame appears when Auto White
Balance is activated. Fill the frame with white completely.
●
A
AUTO WHITE A, B OPERATION
B
appears on the
viewfinder when Auto White Balance is activated.
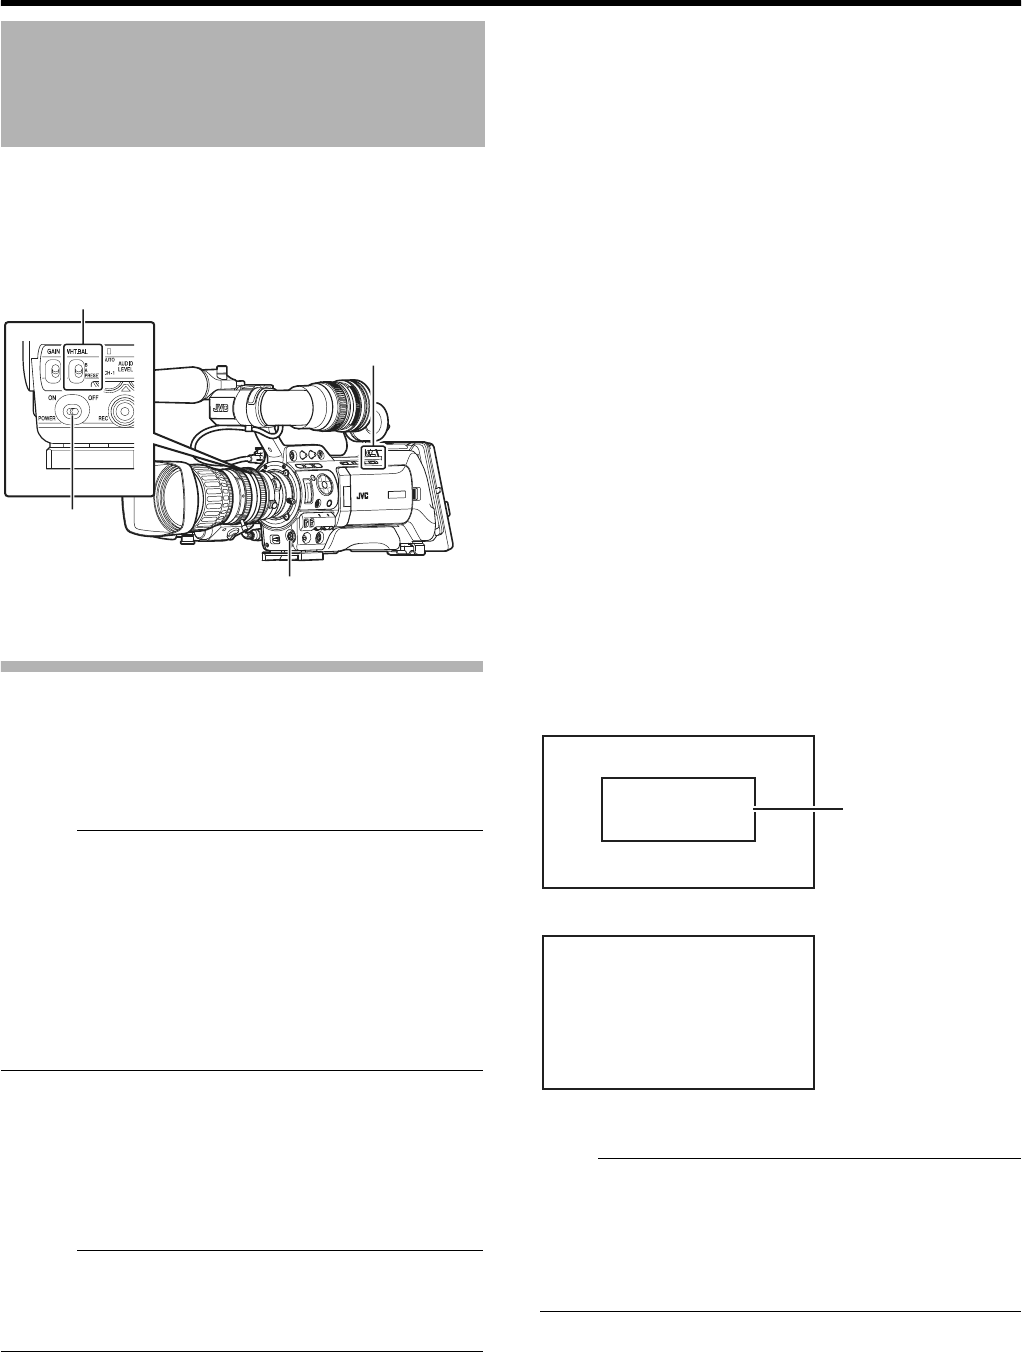
●
When the correct white balance is achieved,
A
AUTO WHITE
A, B OK
B
appears for about 3 seconds together with the
approximate color temperature.
Note :
●
Do not use highly reflective objects, such as metals. Doing
so may result in improper white balance adjustment.
●
The Auto White function cannot provide optimum white
balance with an object outside the adjustment range, for
example when it contains only a single color or not enough
white color.
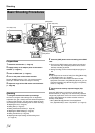
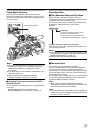
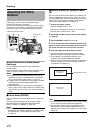
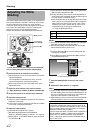
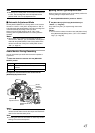
Adjusting the White
Balance
[WHT.BAL.] Selection Switch
[FULL AUTO]
Switch
[POWER]
Switch
[AWB] Button
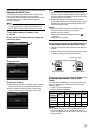
AUTO WHITE A
OK <3200K>
AUTO WHITE A
OPERATION
[AWB] Activating
Result Display
White Detection Frame