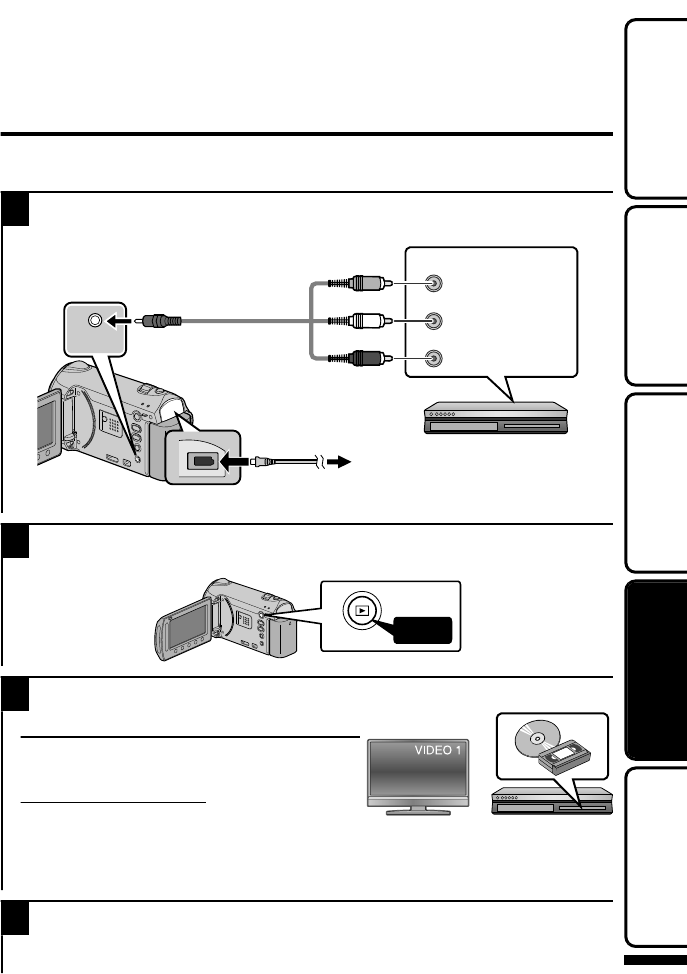
Dubbing Files by Connecting to a DVD
Recorder or VCR
You can dub videos in standard quality by connecting to a DVD recorder or VCR.
Refer also to the instruction manual of the TV, DVD recorder, VCR, etc.
1
Connect to a VCR/DVD recorder.
●
Press the Power button (M) for more than 2 seconds to turn off this unit.
.
AV
To DC Terminal
VCR/DVD Recorder
Video Input
Audio Input (L)
Audio Input (R)
Yellow
White
Red
Video Input
To AV Terminal
AV Cable
(Provided)
AC Adapter
To AC Outlet
(110 V to 240 V)
●
This unit powers on automatically when the AC adapter is connected.
2
Select the playback mode.
●
Turn on this unit.
.
3
Prepare to record.
Preparation on TV and VCR/DVD recorder
●
Switch to a compatible external input.
●
Insert compatible blank DVD or VHS to dub.
Preparation on this unit
●
Set “VIDEO OUTPUT” in the connection
settings menu to the aspect ratio (“4:3” or “16:9”) of the connecting TV.
●
To include the date during dubbing, set “DISPLAY ON TV” in the “CONNECTION
SETTINGS” menu to “ON”. Set “ON-SCREEN DISPLAY” in the playback menu to
“DISPLAY DATE ONLY”.
4
Start recording.
●
Start playback on this unit ( P.15) and press the record button on the recorder.
●
After playback is complete, stop the recording.
For more information, refer to the Detailed User Guide
http://manual.jvc.co.jp/index.html/
19
Getting StartedRecordingPlaybackCopyingOthers
