


EN 11
4
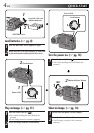
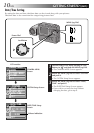
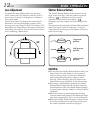
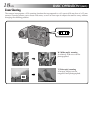
Set the values for the date.
1. Rotate the MENU Jog Dial to select the item
in the “DATE” section you wish to set and
push it.
•The item colour changes to indicate that
setting is possible.
2. Rotate the MENU Jog Dial until the correct
setting appears and push it.
•Repeat this procedure until you are
satisfied with the date settings.
• If you wish to set only the date without
changing the time, go to step 6.
5
Set the values for the time.
1. Rotate the MENU Jog Dial to select the item
in the “TIME” section you wish to set and
push it.
•The item colour changes to indicate that
setting is possible.
2. Rotate the MENU Jog Dial until the correct
setting appears and push it.
•When the MENU Jog Dial is pushed after
the minutes are set, “EXIT” is selected and
clock operation starts from 0 seconds.
•Repeat this procedure until you are
satisfied with the time settings.
6
Rotate the MENU Jog Dial to select “EXIT”
and push it 3 times.
•The shooting screen reappears and the clock
starts functioning.
NOTES:
●
The date/time setting is backed up by a built-in
rechargeable clock battery. Connect the camera
to an AC outlet using the AC power adapter for
over 24 hours to charge the clock battery.
●
The clock will continue to advance except while
the minutes are being set. When the minutes are
set and the MENU Jog Dial is pushed, the seconds
are reset to “0” and clock operation starts.
●
Although the date/time which you have set is
stored in the camera’s built-in memory, the date/
time display will not be combined with the
pictures you shoot.
DATE / T I ME
EX I T
DATE
27.12.1998
TIME
9:30
DATE / T I ME
EX I T
DATE
27.12.1998
TIME
9:30
DATE / T I ME
EX I T
DATE
27.12.1998
TIME
14:20
DATE / T I ME
EX I T
DATE
27.12.1998
TIME
14:20
14:20:00
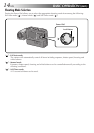
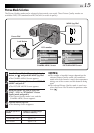
DATE/TIME Setup
Screen
LCD monitor