


60
EN
Shooting functions k Exposure, image and color
3
TIPS
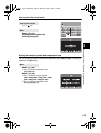
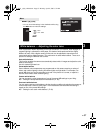
Checking the white balance you have adjusted:
J After performing Step 3, point the camera at the subject to take test shots. When the AEL/AFL
button is pressed, sample images that have been taken with the current WB settings are
displayed.
Adjusting all WB mode settings at once:
J Refer to “Compensating all WB” (P. 78).
Setting the one-touch white balance
This function is useful when you need a more precise white balance than preset WB can
provide. Point the camera at a sheet of white paper under the light source you want to use to
determine the white balance. The optimum white balance for the current shooting conditions
can be saved in the camera. This is useful when shooting a subject under natural light, as
well as under various light sources with different color temperatures.
Set [; FUNCTION] to [V] beforehand. (gP. 79)
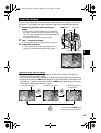
1 Point the camera at a sheet of white paper.
• Position the paper so that it fills the viewfinder. Make sure there are no shadows.
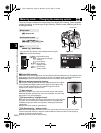
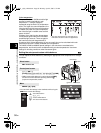
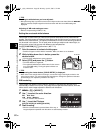
2 While holding down the < button, press the
shutter button.
• The one-touch white balance screen appears.
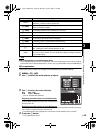
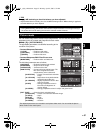
3 Select [YES] and press the i button.
• The white balance is registered.
• The registered white balance will be stored in the camera
as a preset WB setting. Turning the power off does not
erase the data.
TIPS
After pressing the shutter button, [WB NG RETRY] is displayed:
J When there is not enough white in the image, or when the image is too bright, too dark or the
colors look unnatural, you cannot register the white balance. Change the aperture and shutter
speed settings, then repeat the procedure from Step 1.
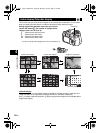
WB bracketing
Three images with different white balances (adjusted in specified color directions) are
automatically created from one shot. One image has the specified white balance, while the
others are the same image adjusted in different color directions.
1 MENU[X][WB BKT]
2 Use p to select the color direction.
R-B RedkBlue
G-M GreenkMagenta
• You can set both color directions.
3 Use p to set the EV steps.
[OFF]/[3F 2STEP]/[3F 4STEP]/[3F 6STEP]
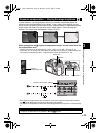
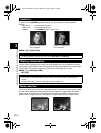
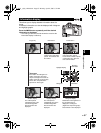
4 Start shooting.
• When the shutter button is pressed down all the way, 3
images adjusted in specified color directions are automatically created.
< button
s0010_e_00_unified.book Page 60 Monday, April 9, 2007 6:12 PM