84
LSQT1319
Setup
2
Connection and recognition
After the software is installed, the unit must be connected to the PC and be correctly recognized by the
PC.
≥ Remove the supplied CD-ROM from your PC.
≥ Be sure to finalize DVD-RW (VR format), DVD-RW (Video format) and DVD-R/DVD-R DL discs
on this unit, before using them on the PC. Discs that have not been finalized will not be
recognized by the PC.
¬Connect this unit to the AC adaptor.
1 Insert a disc or SD card with
recorded images in the unit, then
turn on the unit.
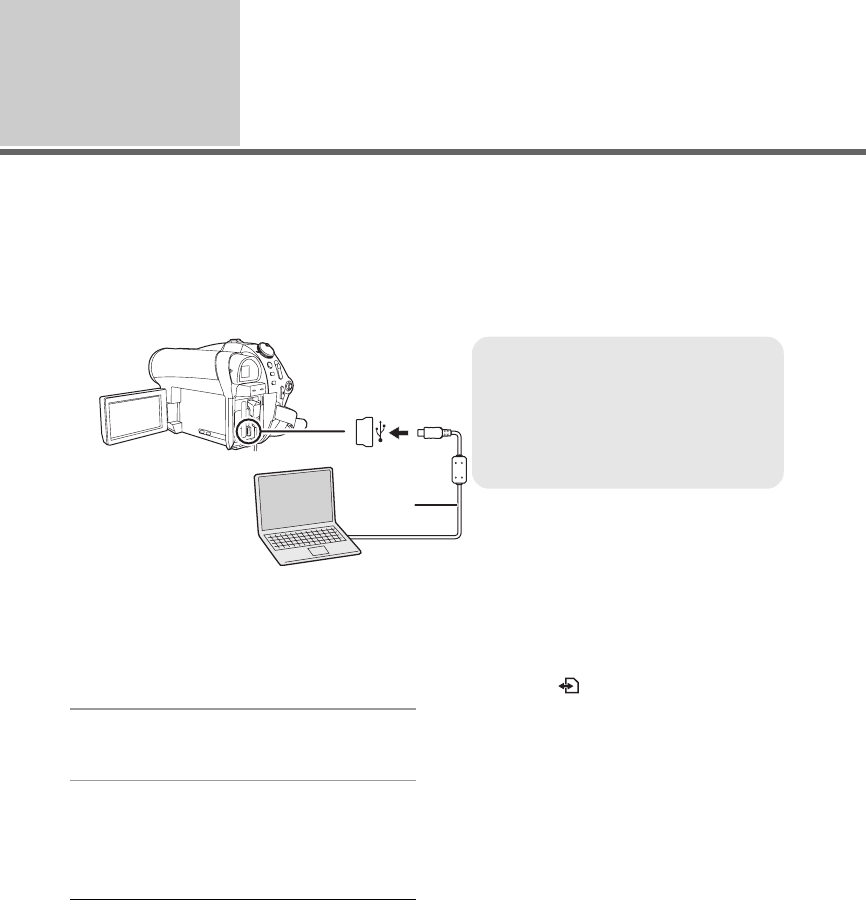
2 Connect this unit and a PC.
The USB function selection screen will appear.
3 Select [PC CONNECT(DISC)] or
[PC CONNECT(CARD)] and press
the joystick.
This unit is automatically detected by the PC.
≥ When the unit is connected to a PC, its
power cannot be turned off. Disconnect the
USB cable before turning this unit off.
(l 86)
≥ If the unit is connected to a PC when the USB
function is set to [PC CONNECT(DISC)], no
image will appear on the LCD monitor or the
viewfinder.
≥ When this unit is connected to a PC, you
cannot use this unit’s DISC EJECT lever to
remove a disc. Use Windows Explorer to right-
click the drive icon for this unit and select
[Eject].
≥ Do not disconnect the USB cable or AC
adaptor while the access lamp is on or SD card
access icon ( ) appears on the LCD monitor.
Doing so may damage the data on the disc or
SD card.
≥ The disc and SD card cannot be accessed
simultaneously.
≥ It may be necessary to reboot the PC after
connecting this unit to it for the first time.
A
A USB cable (supplied)
≥ Insert the USB connectors as far as
they will go.
≥ Do not use any other USB connection
cables except the supplied one.
(Operation is not guaranteed with any
other USB cables.)
VDR-D50P&PC-LSQT1319_eng.book 84 ページ 2007年11月14日 水曜日 午後5時21分


