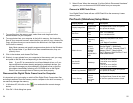
3. Go back to Home screen to select Video.
4. Use the Arrow keys to choose Video and press Select. A screen listing all of
the video files opens.
5. Use Arrow buttons to choose the desired file and press Play. The Digital
Photo Frame plays the video.
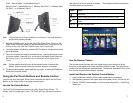
6. When video is playing, touch PanTouch point, Adjust the volume by using
VOL+/VOL– buttons on PanTouch button menu.
7. To play another video file, press BACK button to go back to VIDEO list
screen, and press UP and DOWN arrow button to select desired video, press
PLAY to play.
Photo Copy Method Options
There are two methods to copy photos from an external memory card to the built-
in memory. One is called optimized and the other, non-optimized. In the case of
optimized copy, the original photo is downscaled in size and re-encoded into a
smaller sized JPEG., thus a lot more photos can be stored in the built-in memory.
The non-optimized photo copy will simply copy the original photo file into the
built-in memory.
Changing the Photo Copy Method.
The DPF is produced with optimized photo copy as default. To change to non-
optimized, go to the PanTouch Home Menu, press the setup button and select
Photo Copy Method.”
1. Select “Non-optimized” to make photo copy in the original photo file size.
2. Select “Optimized” to go back to automatically compress your pictures before
copying to built-in memory.
3. Press BACK to close the menu.
Copying Photos from a Memory Card to Built-in
Memory
The Digital Photo Frame can store photos in its built-in memory. You can copy
photos one at a time, or in batches.
Copy a Single Photo
Use the Remote Control to copy a photo from a memory card to the built-in
memory.
1. Press the EXIT button until the HOME screen displayed, press SETUP to
choose Select Media option then press ENTER.
2. Use the Arrow buttons to highlight the desired media source.
3. Press the ENTER button to select the media source. Go back to Home
screen
4. Select Photo and press ENTER. The Thumbnails screen opens.
5. Use the Arrow Buttons to highlight and Select the photos you want to copy.
6. Press the SETUP button. The on-screen setup menu opens on the Digital
Photo Frame.
7. Choose Copy Photo then submenu Copy Selected and press ENTER. The
message displays “Finish” on the lower right screen. Note: the default
setting is “Optimized” for copy photo into Digital Picture Frame built-in
memory.
8. Press EXIT to return to the Thumbnails screen.
Use the PanTouch Menu to copy a photo from a memory card to the built-in
memory.
1. Press the SETUP button from the Home screen.
2. Select Media Source.
3. Use the Arrow buttons to highlight the desired memory card.
4. Press the SELECT button to select the card.
5. Press Back from PanTouch menu to go back to Home screen.
6. Highlight Photo and press ENTER. The Thumbnails screen opens.
7. Use the Arrow Buttons to highlight the photo you want to copy.
8. Press the SELECT button on the highlighted photo.
9. Press the COPY SEL to copy selected file.
10. Once the copying is complete, a “Finished!” message display in the middle of
the screen.
Copy Several Photos
Use the Remote Control to copy photos from an external (e.g. memory card)
media source to built-in memory.
1. Press the EXIT button until the Home screen opens.
2. Press SETUP on the remote control, an on-screen menu open, then use
arrow key to highlight Select Media option, then press ENTER, submenu open.
3. Use arrow key to select desired memory, then Press ENTER. Press EXIT key
twice to return to Home screen.
4. Select Photo and press Enter, The Photo Thumbnails screen opens.
14 15


