


C2601M-C (3/07) 23
UPGRADING THROUGH A DIRECT CONNECTION
Follow these instructions if you are connected to the DX4000 from a remote computer with a crossover cable. This computer also must have
access to upgrade files either on a network drive or a CD.
NOTE: If you have not already done so, follow the instructions at Locating the IP Address on page 20 to locate the IP address for the DX4000.
1. Connect the remote computer to the DX4000 with a crossover cable.
2. Turn off the DX4000 and disconnect the power cable.
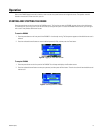
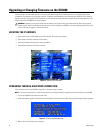
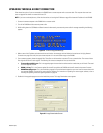
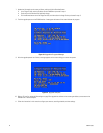
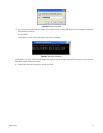
3. While holding down the SCR Mode and Return buttons simultaneously, reconnect the power cable. A message resembling the following
appears.
Figure 19. Firmware Upgrade Message
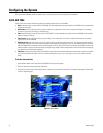
4. Make a note of the IP address and subnet mask that are listed on the message, and then follow the instructions at Verifying Network
Connections on page 25 to verify that your remote computer is in the same subnet range as the DX4000.
5. From a remote computer, locate the upgrade files. These files can be located on a resource CD or on a network drive. The names of these
files might be different for each upgrade. The following file names are examples of what you should find:
• FirmwareUpgradeUtility.exe: This is the upgrade program that contains the software version number that you will install. The actual
file name might be different.
• DX4000_1.3.img: This is the firmware update file that will be copied to the DX4000 and that will overwrite the current firmware.
• DX4000RemoteAgent.exe: This is the installation program for the revised remote agent that you must install to communicate with
the upgraded DX4000. The actual file name might be different. For instructions on updating the remote agent software, refer to
Installing and Updating the Remote Agent Application on page 28.
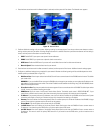
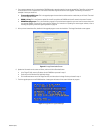
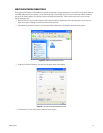
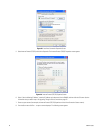
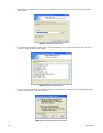
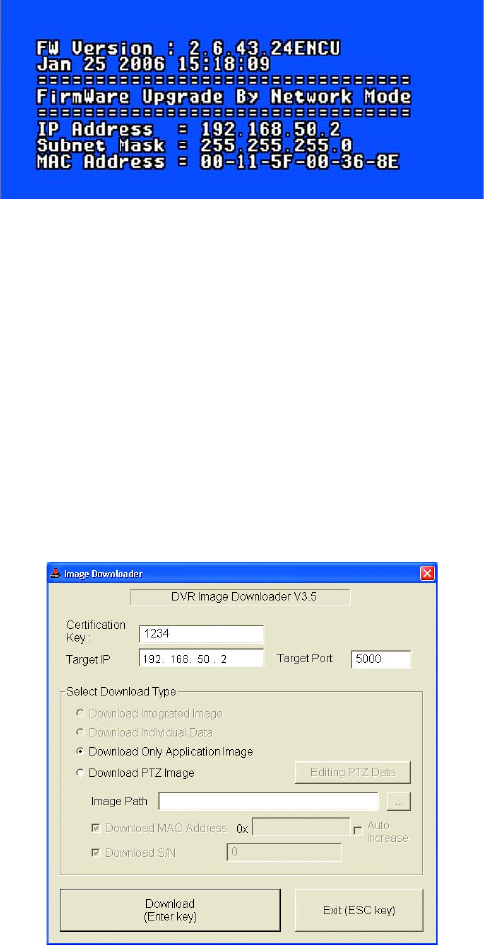
6. Double-click the upgrade program to start the installation process. The Image Downloader screen appears.
Figure 20. Image Downloader Screen