


23
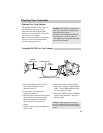
Recording
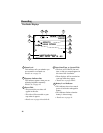
7. Place the LIGHT OFF•AUTO•ON
switch in AUTO.
The light will turn on automatically
when you need more light.
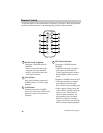
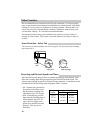
8. Set the SCENE SELECT AE Dial.
• Place the dial in AUTO to place the
camcorder in the AUTO mode.
• Place the dial in ( ) sports
or ( ) fast speed shutter to record
fast moving action.
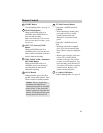
• Place the dial in ( ) back light
or ( ) front light to compensate
for unusual lighting situations.
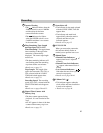
• Place the dial in ( ) spotlight to
create the effect of the subject being
in a spotlight.
• Place the dial in ( ) portrait to
create the effect of the subject being
in a frame.
• Place the dial in ( ) sepia to create
the effect of an old movie.
• Place the dial in MAN and
experiment with the MODE and F1
and F2 buttons.
• Select F1 FADE to fade in and out
of scenes.
• Select F2 16X9 to record using the
16X9 format.
• Select F1 FOCUS to manually
focus.
• Select F2 EXPOSURE to adjust
the iris (brightness).
• Select F1 TITLE to select and
record one of the preset titles.
•Select F2 DISPLAY to display and
record the date, time and date, or
create and record your own title.
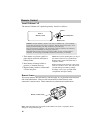
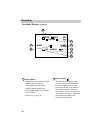
9. Start and stop recording.
• Press and release the thumb trigger
to start recording. REC 666
appears in the viewfinder and the
tally light will light when the
camcorder is recording.
• Press and release the thumb trigger
again to stop recording. The
camcorder is now in record pause.
appears in the viewfinder.
• The camcorder will automatically
turn off if it remains in record pause
for five minutes. Place the POWER
switch in OFF and then back in
CAMERA.
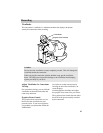
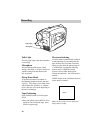
10.Use the zoom feature.
• Zoom in and out using the power
zoom T and W lever.
11.Review what you have recorded.
• Press and release EDIT SEARCH –
to review the last few seconds of the
recording.
• Press and hold EDIT SEARCH – or
+ to visually see what you have
recorded. Release the button to
begin recording at that point.
PAUSE