


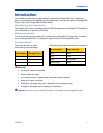
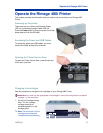


Operate the Rimage 480i Printer
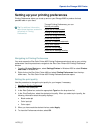
Setting up your printing preferences
Printing Preferences allows you to set up and run your Rimage 2000i to produce the best
possible label on your discs.
# Tip For additional information
about these features, access the
online help in Printing
Preferences.
Through Printing Preferences, you can:
Set the print quality
Adjust the ink volume used
Change or enable masking
Center the image on the disc
Check the ink levels
Add, edit, or delete a watermark
Set up color options
Align the ink cartridges
Clean the ink cartridge nozzles
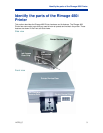
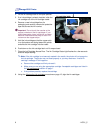
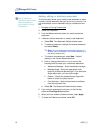
Navigating to Printing Preferences
You must access the Disc Color Printer 480i Printing Preferences window to set up your printing
preferences. Use this procedure to navigate to the Disc Color Printer 480i Printing Preferences
window.
1. From the Windows Start menu, select Settings|Printers in Windows 2000 or select Printers
and Faxes in Windows XP.
2. Right-click on the Disc Color Printer 480i and select Printing Preferences from the drop-
down menu. The Disc Color Printer 480i Printing Preferences window opens.
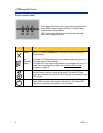
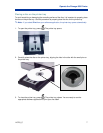
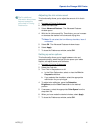
Setting the print quality
Use this procedure to change the print quality for your images, if necessary.
1. Navigate to Printing Preferences.
2. Select the Disc/Quality tab.
3. In the Disc Options box, select the appropriate Type from the drop-down list.
4. In the Print Quality box, select the desired print quality. When you select a print quality, the
following information about the quality displays:
• Black render dpi
• Color input dpi
• Color output
5. When you have made the desired choices, select Apply.
6. To close the Preferences window, select OK.
110761_C 9