


VL-A10H/pp. 008-015; 00/2/2/18:00
G.K. Associates, Tokyo
Preparation
Preparation
13
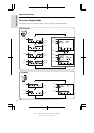
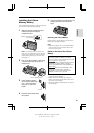
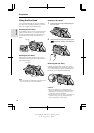
Setting the Date and Time
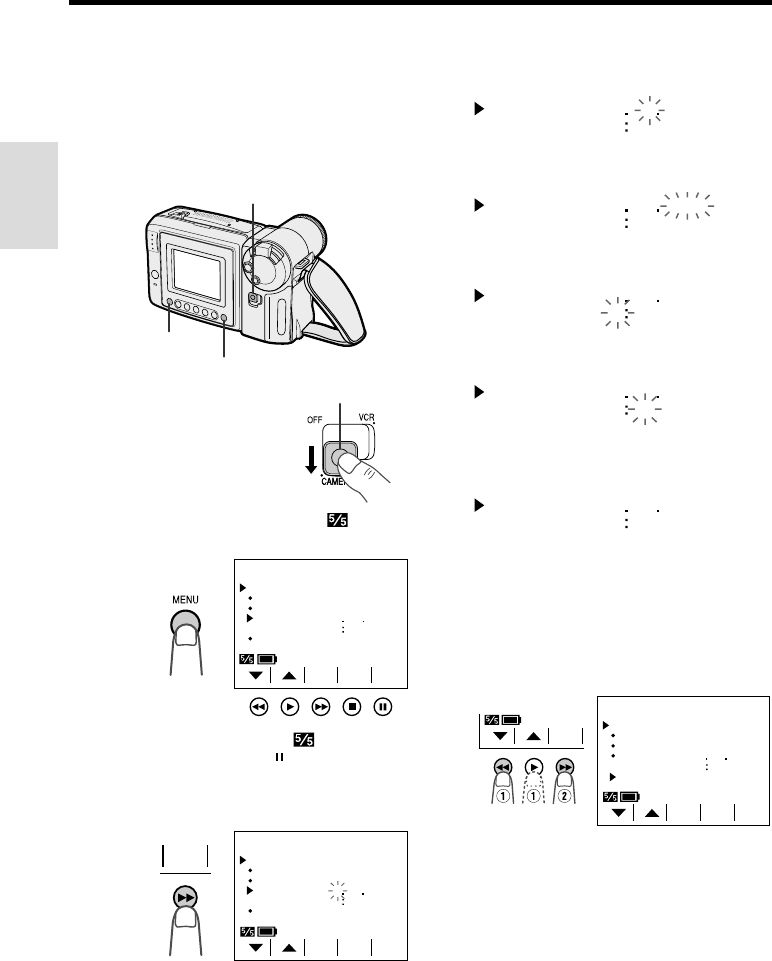
Example: Setting the date to 2 June 2001 (2. 6.
2001) and the time to 10:30 am (10:30).
Note:
• Check that the lithium memory battery has been
installed before setting the date and time.
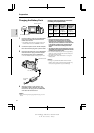
4 Press the ĭ or İ button (C or D) to
select “2” (day), and press the SET
button.
5 Press the ĭ or İ button to select “6”
(month), and press the SET button.
6 Press the ĭ or İ button to select
“2001” (year), and press the SET button.
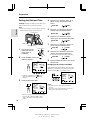
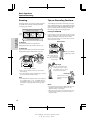
7 Press the ĭ or İ button to select “10”
(hour), and press the SET button.
8 Press the ĭ or İ button to select “30”
(minute), and press the SET button.
• The internal clock now starts operating.
9 Press the DISPLAY button to turn off the
menu screen
.
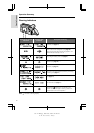
Changing to the 12-hour Time Mode
After performing step 8 above, press the ĭ or
İ button (Q) to select “12H/24H”, then press
the SET button (B) (W) to select “12H”.
Notes:
• The date and time, once set, are stored in
memory.
• The menu screen automatically turns off if no
settings are made within 5 minutes.
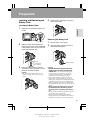
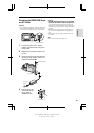
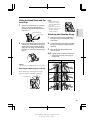
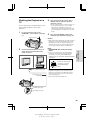
Power switch
1 Hold down the Lock
button and slide the
Power switch to
CAMERA.
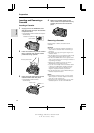
2 Press the MENU button until
(MENU 2) appears.
• If MENU 1 appears on the screen,
press the PAGE button ( ) to display
MENU 2.
3 Press the SET button (B).
• When changing the date and time settings,
press the ĭ or İ button (C or D) to
select “SETTING”, then press the SET
button.
Lock button
MENU
DATE
DISPLAY OFF
SETTING
12H 24H
SELECT DATE TIME
+
TIME/
/
2
PAGETURE
PIC
-
SET
1
000
1 2000
24H
SET
2
10 30 AM
6 2001
MENU
12H
DATE
DISPLAY OFF
SETTING
12H 24H
SELECT DATE TIME
+
TIME/
/
2
PAGETURE
PIC
-
SET
MENU
DATE
DISPLAY OFF
SETTING
12H 24H
SELECT DATE TIME
+
TIME/
/
2
PAGETURE
PIC
-
SET
SET
1
000
1 2000
24H
MENU button
DISPLAY button
2
000
1 2000
SETTING
2
000
6 2000
SETTING
2
000
6 2001
SETTING
2
10 00
6 2001
SETTING
2
10 30
6 2001
SETTING