


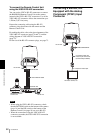

Installation and Connections
Installation
48
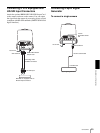
Note
For attaching the camera to the ceiling bracket, use
only the supplied screws. Using other screws may
damage the camera.
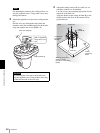
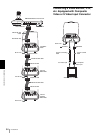
3
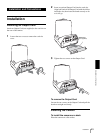
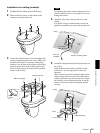
Attach the supplied wire rope to the ceiling bracket
(A).
Pass the wire rope through the fixing hole and
attach its end to the attachment hole on the bracket
using the supplied one screw (3M4 × 8).
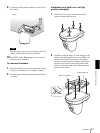
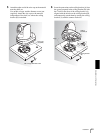
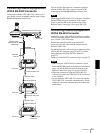
4
Attach the ceiling bracket (B) to a shelf, etc. on
which the camera is to be installed.
Use four screws (not supplied) appropriate for the
materials of the shelf, etc.
Align the f hole on the ceiling bracket (B) in the
direction where the front of the camera will be
positioned later.
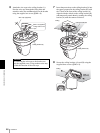
For attaching the wire rope to the bracket, use
only the supplied screw. Using another screw may
disable the function of the wire rope.
3M4 × 8 (supplied)
Wire rope (supplied)
Ceiling bracket (A)
Fixing hole for wire
rope
Caution
Ceiling
bracket (B)
f Screw hole
(front of the
camera)
Wall
Shelf, etc.
Screws (4)
Hole for
connecting
cables
About 70 mm (2 7/8 in.)
diameter hole for
protrusions of the ceiling
bracket