


71
Customizing your camcorder
b Notes
• Do not use [SUPER NIGHTSHOT] in bright
places. This may cause a malfunction.
• Do not cover the infrared port with your fingers
or other objects.
• Remove the conversion lens (optional).
• Adjust the focus manually ([FOCUS], p. 67)
when it is hard to focus automatically.
• The shutter speed of your camcorder changes
depending on the brightness, which may result
in a slowdown of the motion of the image.
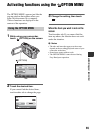
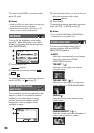
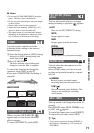
You can record a transition with the
following effects adding to the interval
between scenes.
1 Select the desired effect in [STBY] (during
fading in) or [REC] (during fading out)
mode, then touch .
2 Press START/STOP.
The fader indicator stops flashing and
disappears when the fade is complete.
To cancel the fader before starting the
operation, touch [OFF] in step 1.
If you press START/STOP, the setting is
canceled.
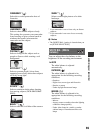
WHITE FADER
BLACK FADER
When you select [OLD MOVIE],
appears and you can add an old movie
effect to images.
To cancel [D.EFFECT], touch [OFF].
You can add special effects to an image
during recording or playback. appears.
BOFF
Does not use [PICT.EFFECT] setting.
SEPIA
Images appear in sepia.
B&W
Images appear in black and white.
PASTEL
Images appear as a pale pastel drawing.
You can select the microphone level for
recording sound.
Select [LOW] when you want to record
exciting and powerful sound in a concert
hall, etc.
BNORMAL
Records various surround sounds,
converting them into the certain level.
LOW ( )
Records surround sound faithfully. This
setting is not suitable for recording
conversations.
You can record a still image after about 10
seconds.
Press PHOTO when [SELF-TIMER] is set
to [ON], and appears.
To cancel the count down, touch [RESET].
To cancel the self-timer, select [OFF].
z Tips
• You can also operate by pressing PHOTO on
the Remote Commander (p. 122) (except for
DCR-SR42).
FADER
D.EFFECT (Digital effect)
Fading out Fading in
PICT.EFFECT (Picture
effect)
MICREF LEVEL
SELF-TIMER