


81
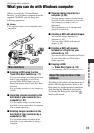
Performing with a computer
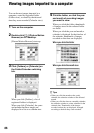
7 Click [One Touch Disc Burn] in the
[HDD Handycam Utility] window on
the computer screen.
8 Click [Start].
The DVD recognition window is
displayed on the computer screen.
When the DVD type is recognized,
DVD creation begins.
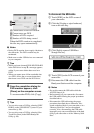
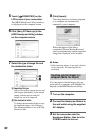
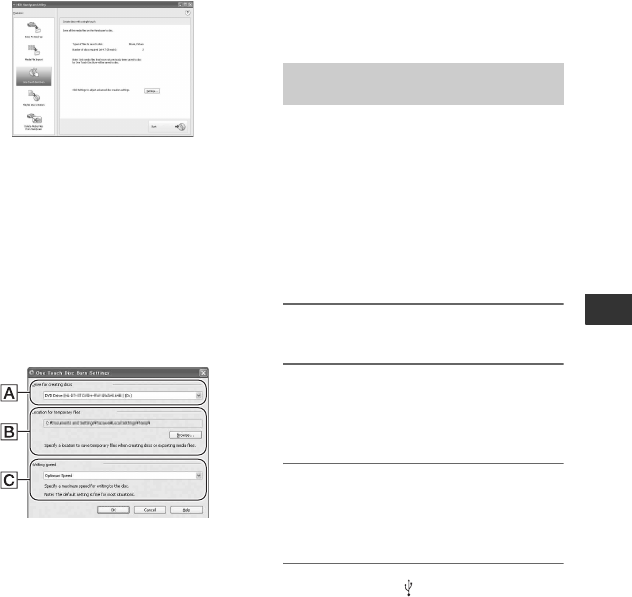
To customize the settings of the DVD
drive used for creating a DVD
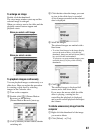
1 Click [Settings...] in step 7 in “To
perform [One Touch Disc Burn] on the
HDD Handycam Utility of a computer”.
ADrive settings
Select the drive you want to use to
create a DVD.
BLocation for temporary files
Specify a folder to be used to save
temporary files in the window
displayed when [Browse] is clicked.
CWriting speed
Select [Optimum Speed] for normal
usage. If DVD creation failure persists,
select lower speed.
2 Click [OK] when the setting is
completed.
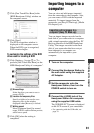
Importing images to a
computer
You can view and edit images imported
from the camcorder to the computer. Also,
you can create a DVD with the imported
materials. To import images from the
camcorder, use [Easy PC Back-up], [Media
File Import], etc.
You can import images recorded on the
hard disk of your camcorder to a computer
with a simple operation using the Easy PC
Back-up function of the HDD Handycam
Utility. The images recorded on the hard
disk of your camcorder that have not yet
been imported to a computer can
automatically be imported to your
computer.
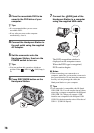
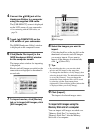
1 Turn on the computer.
2 Connect the Handycam Station to
the wall outlet using the supplied
AC Adaptor.
3 Set the camcorder onto the
Handycam Station, then turn the
POWER switch to turn on.
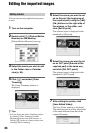
4 Connect the (USB) jack of the
Handycam Station to a computer
using the supplied USB cable.
The [USB SELECT] screen is displayed
on the LCD screen of your camcorder.
• For connecting with the USB cable, see
page 78.
Importing entire images to a
computer (Easy PC Back-up)