Connecting to a Windows computer
Connecting to a Windows computer
15
10Touch [P-MENU], [MENU], [
(STANDARD SET)] and [USB-PLY/
EDT], then touch to select [STD-USB].
11Connect your camcorder to the
computer via the USB cable (p. 14).
[USB MODE] appears on the LCD screen
of your camcorder and the computer starts
to recognize the camcorder.
It may take some time for the computer to
recognize the camcorder when you connect
the USB cable for the first time.
For Windows XP
If [Found New Hardware Wizard] appears,
click [Continue Anyway] and complete the
installation.
To disconnect the USB cable
For Windows 2000/Windows Me/
Windows XP
If [USB MODE] appears on the LCD screen,
follow the procedure below to disconnect the
USB cable.
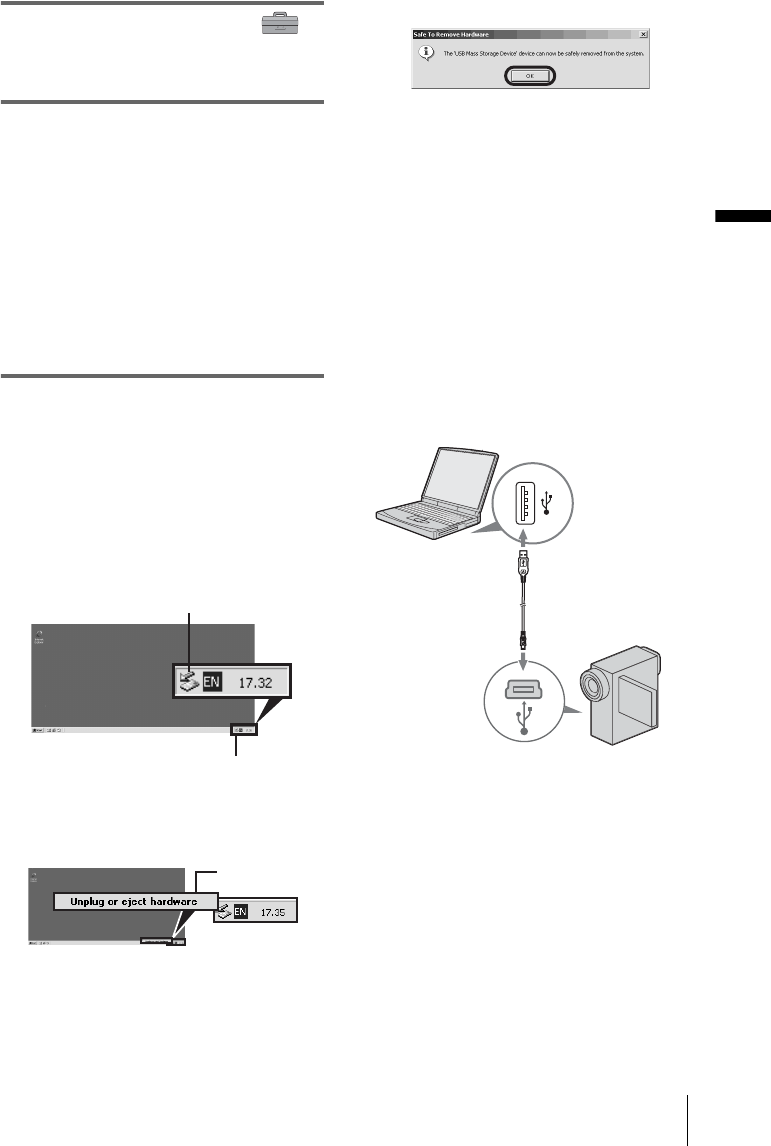
1 Click the [Unplug or eject hardware]
icon on the task tray.
2 Click [Unplug or eject hardware]
([Safely remove Sony Camcorder] in
Windows XP).
3 Click [OK].
4 Disconnect the USB cable from the
camcorder and computer.
If [USB MODE] does not appear on the LCD
screen, do only step 4 above.
For Windows 98/Windows 98SE
Do only step 4 above.
Recommended connection
Connect as shown in the following illustrations
to operate the camcorder correctly.
• Connect the camcorder to a computer via the
USB cable (supplied). Make sure no other
USB devices are connected to the computer.
Click this icon.
task tray
Click here.
,continued
