66
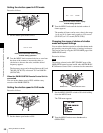
Setting the Time Data
Chapter 4 Adjustments and Settings for Recording
5
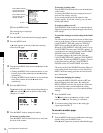
Set the F-RUN/SET/R-RUN switch to F-RUN or R-
RUN, corresponding to the desired operating mode for
the time code generator.
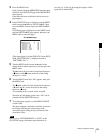
The set user bit data will be recorded for both LTC and
VITC.
To store the user bit setting in memory
The user bit setting (apart from the real time) is
automatically retained in memory even when the power is
turned off.
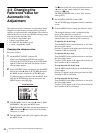
4-5-4 Synchronizing the Time Code
You can synchronize the internal time code generator of
this camcorder with an external generator for the
regeneration of an external time code. You can also
synchronize the time code generators of other camcorders/
VTRs with the internal generator of this camcorder.
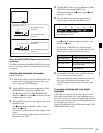
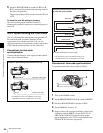
Connections for time code
synchronization
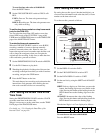
Connect both the reference video signal and the external
time code as illustrated below.
Procedure for time code synchronization
To synchronize the time code, proceed as follows:
Synchronizing the time code
1
Turn on the POWER switch.
2
Set the PRESET/REGEN/CLOCK switch to PRESET.
3
Set the F-RUN/SET/R-RUN switch to F-RUN.
4
Set the DISPLAY switch to TC.
5
Supply a time code signal and a reference video signal
complying with the SMPTE (for the DVW-970) or
EBU (for the DVW-970P) standard and in proper
phase relationship, to the TC IN connector and to the
GENLOCK IN connector, respectively.
Example 1: Synchronizing with an external time code
1) Set GENLOCK to ON on the GENLOCK page of the
MAINTENANCE menu, if GENLOCK is set to OFF.
GENLOCK IN
1)
Reference video signal
TC IN
External time code
Example 2: Interconnecting a number of camcorders
for time code synchronization
1) Set GENLOCK to ON on the GENLOCK page of the
MAINTENANCE menu, if GENLOCK is set to OFF.
TEST OUT
To another camcorder to be synchronized
TC OUT
Reference camcorder
TC IN
GENLOCK IN
1)
TC OUT
TEST OUT
GENLOCK IN
1)
TC IN
TC OUT
TEST OUT
1
2
4
3


