


Chapter 4 Viewfinder Screen Indications and Menus 77
Chapter 4 Viewfinder Screen Indications and Menus
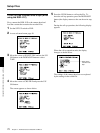
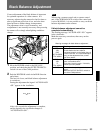
The cursor (→) changes to the text entry cursor
(↓).
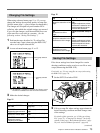
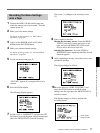
8 Enter a name for the data.
Moving the text entry cursor: Press the MENU/
STATUS switch up to move the cursor to the
right, and press the MENU/STATUS switch
down to move the cursor to the left.
Selecting the character: Press the UP/ON or
DOWN/OFF button repeatedly until the desired
character appears.
9 After completing text entry, move the cursor to the
parenthesis position.
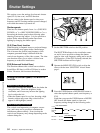
The display changes as follows.
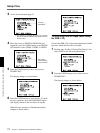
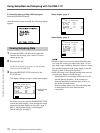
10Move the cursor to “SURE TO STORE?” and
press the UP/ON button to record the menu
settings onto the tape (press the MENU/STATUS
switch to cancel).
The display changes as follows and the data
recording begins.
Name of data
being recorded
Recording the Menu Settings
onto a Tape
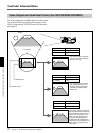
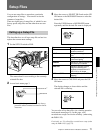
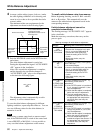
1 Connect the DSR-1/1P and load the tape onto
which the settings are to be recorded. Turn the
camera power on.
2 Make your basic menu settings.
For details of this operation, see “Basic Menu
Operations” (page 58).
3 Again, set the POWER switch to ON while
holding down the UP/ON button.
4 Make your advanced menu settings.
For details of this operation, see “Advanced Menu
Operations” (page 64).
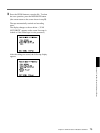
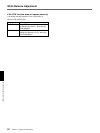
5 Access advanced menu page 15.
“NO TAPE” appears if you neglected to load a
cassette.
6 Press the UP/ON button.
The following display appears.
7 Set the cursor to “NAME SET” and press the UP/
ON button to record the menu setting onto the tape.
(Press the MENU/STATUS switch to cancel.)