


Chapter 5 Adjustments and Settings 93
Chapter 5 Adjustments and Settings
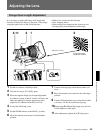
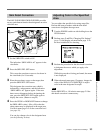
Skin Detail Correction
The DXC-D35/D35P/D35WSL/D35WSPL provides
an easy push-button function that designates an active
skin tone area.
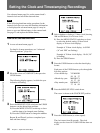
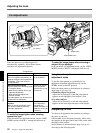
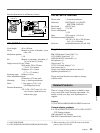
1 Set the SKIN DTL switch to ON.
The indication “SKIN AREA: ±0” appears in the
viewfinder.
2 Press the SKIN DTL SET button.
This causes the area detect cursor to be shown in
the viewfinder (for 10 seconds).
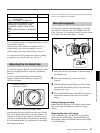
3 Place the area detect cursor on the target, then
press the SKIN DTL SET button.
This designates the correction area, which is
indicated by a zebra pattern, and the indication
“SKIN AREA: ±0” appears again. If the area
detect cursor disappears before designating the
area, press the SKIN DTL SET button again to
display the cursor. (Return to step 2.)
4 Press the UP/ON or DOWN/OFF button to change
the SKIN AREA value (–99 to +99)so that the
zebra pattern may be displayed in the target area.
Use basic menu page 2 to set the correction level
(see page 59).
You can also change color in the designated area
(see the following section).
2,3
1
ON
OFF
SET
SKIN DTL
Adjusting Color in the Specified
Area
You can adjust the specified color using setup files.
Perform the same procedure with the skin detail
correction to designate the target area .
1 Turn the POWER switch on with holding down the
UP/ON button.
2 Perform steps 1 and 2 in “Changing File Settings”
(page 73) and display advanced menu page 12 in
the most suitable file for shooting.
3 Perform the procedure for the skin detail correction
to designate the area to which you apply color
adjustment.
While this procedure is being performed, the menu
is not displayed.
4 When advanced menu page 12 appears, change the
value of the SKIN SAT or SKIN HUE to adjust
color in the area designated in step 3.
Note
Set the SKIN DTL to 1.0 in basic menu page 2 if the
skin detail correction is unnecessary.