


86 Chapter 5 Adjustments and Settings
Chapter 5 Adjustments and Settings
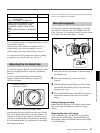
Setting the Clock and Timestamping Recordings
Use advanced menu page 8 to set the camera head’s
internal clock and record the date and time.
Note
If the following date/time setting procedure for the
internal clock does not cause the date/time information
to be displayed in advanced menu page 8, it may be
due to a worn-out lithium battery in the camera head.
See page 23 and replace the lithium battery.
How to set the date and time
1 Access advanced menu page 8.
For details of menu operations, see “Advanced
Menu Operations” (page 64).
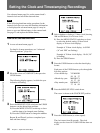
2 Move the cursor to CLOCK SET, then press the
UP/ON button.
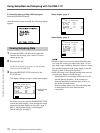
The following display appears, in which the year
indication is flashing.
3 Press the MENU/STATUS switch and the UP/ON
button to set the desired date and time.
1) Press the MENU/STATUS switch up or down
until the item to be changed starts flashing.
2) Press the UP/ON button to change the number.
Repeat 1) and 2) until you have completed your
date and time settings.
4 Select whether to display a 12-hour clock (showing
AM and PM hours) or a 24-hour clock.
1) Press the MENU/STATUS switch up or down
to select the desired setting (12-hour clock
display or 24-hour clock display).
Example of 12-hour clock display: 6:49 PM
(“6” and “PM” are flashing)
Example of 24-hour clock display: 18:49 (“18”
is flashing)
2) Press the UP/ON button.
5 Press the UP/ON button to select the date display
format.
Each press of the UP/ON button cycles through the
following options.
• Year-month-day: YY MM DD
99 10 27
• Month-day-year: MM DD YY
10 27 99
• Day-month-year: DD MM YY
27 10 99
6 Press the MENU/STATUS switch down.
The cursor is shown at the CLOCK SET position.
7 Press the UP/ON button (to a time signal).
The clock starts from 00 seconds. The clock
display can be viewed if CLOCK IND has been set
to ON.
Flashing
Flashing