


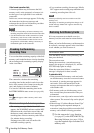

Basic Operations
72
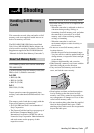
Chapter 4 Shooting
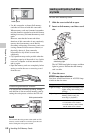
- Press the REC START button (see
page 16).
- Press the VTR button on the lens (see
page 27).
- Turn on the assignable switch to which the
Rec function has been assigned (see
page 132).
During recording, the TALLY indicators, the
tally indicator on the front panel of the
viewfinder, and the REC indication on the
viewfinder screen light. Adjust the zoom and
focus as required.
Notes
• Never remove the battery pack while the
camcorder is recording (while an ACCESS lamp
is lit). Doing so risks the loss of several seconds
of data before the recording was interrupted,
because internal processing will not end
normally.
• The playback control buttons (EJECT, F REV, F
FWD, NEXT, PREV, PLAY/PAUSE, STOP) do
not function during recording.
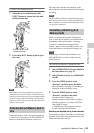
10 To stop recording, perform one of the
operations listed in step 9.
The TALLY indicators, the tally indicator on
the front panel of the viewfinder, and the
REC indication on the viewfinder screen go
out, and camcorder enters recording standby
(STBY) mode.
A clip is created from the video shot between
steps 9 and 10.
To check the recording (recording review)
With the camcorder in recording standby
(STBY) mode, turn on the assignable switch
to which the Rec Review function or the
Freeze Mix function has been assigned (see
page 131).
The camcorder plays the entire last clip, or
the last few seconds of that clip (3 seconds or
10 seconds), and then returns to standby
mode.
You can use MAINTENANCE >Camera
Config >Rec Review in the setup menu (see
page 122) to change the playback time.
When the Rec Review function is assigned to
the RET button on the lens, you can also
conduct a review by using the RET button.
11 Repeat steps 9 and 10 to continue
recording.
With each repetition, another clip is created
on the memory card.
Notes
• You cannot resume recording for about one second
after stopping recording.
• The maximum number of clips that can be recorded on
one memory card is 600. Even if the memory card has
enough free capacity to record more clips, when 600
clips have been recorded, no further recording is
possible.
Notes on Clips
The XDCAM EX-series products limit the
maximum file size of an HD clip to 4 GB and that
of an SD clip to 2 GB.
If you continue recording for an extended period,
recorded materials may be segmented into
multiple files, depending on the file size (the
maximum number of partitions is 99).
The camcorder regards continuous recording as
one clip even if it has been segmented into
multiple files.
When the camcorder is in standby (STBY) mode,
you can play all or part of the most recently
recorded clip (see page 72).
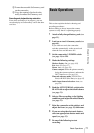
1 Insert the S×S memory card to play (see
page 68).
2 Press the PREV button (see page 20) or
the F REV button (see page 20) to cue
up the clip to play.
3 Press the PLAY/PAUSE button.
The PLAY/PAUSE indicator lights, and the
playback picture appears in the viewfinder.
To pause the playback
Press the PLAY/PAUSE button.
The PLAY/PAUSE indicator flashes during
pause.
Press the button again to return to playback mode.
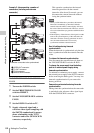
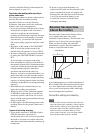
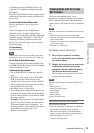
Playing Recorded Clips
Clip 1
Clip 2
Clip 3