Others
Using the SNC video player — Playing a Video/Audio File Recorded with the Camera
120
Using the SNC video player
1
Start the SNC video player.
2
Click the (browse) icon.
The Select File dialog opens.
3
Select the file you want to play.
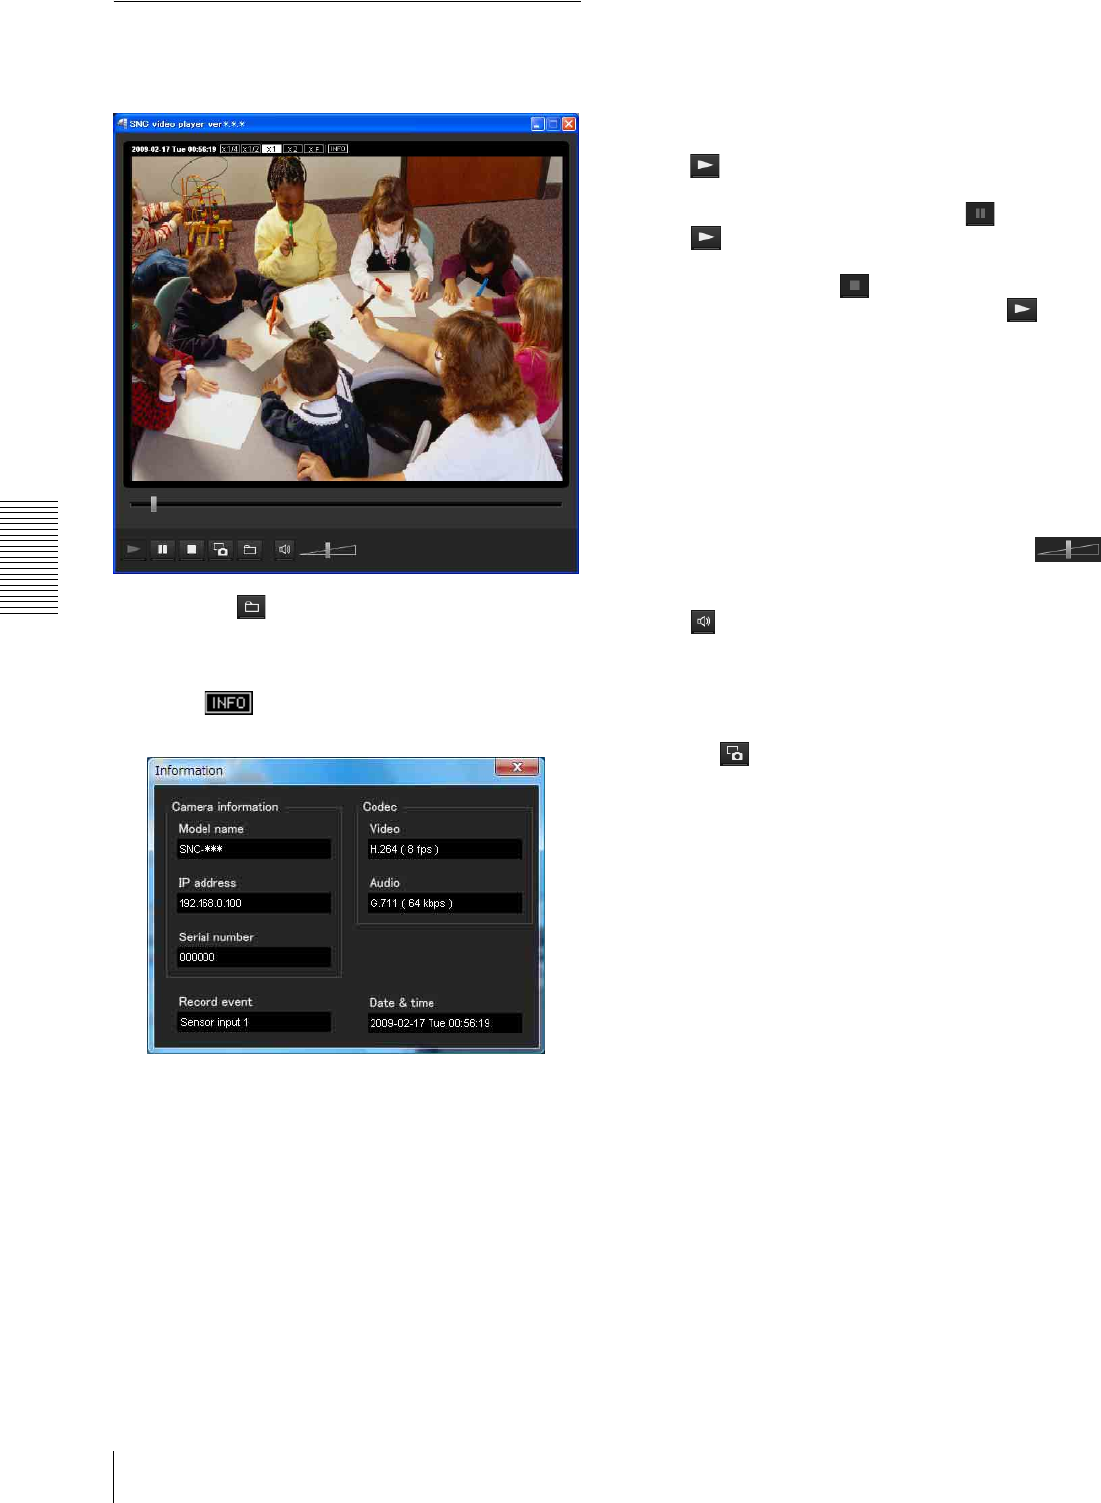
Click on the top of the screen to open the file
information dialog.
File dialog
Model name: Model name of the camera with
which the file was recorded.
IP address: IP address of the camera with which
the file was recorded.
Serial number: Serial number of the camera with
which the file was recorded.
Date&time: Recording date and time
Movie: Video Codec
Audio: Audio Codec
Record event: Type of event used for the
recording: Sensor input, Camera tampering
detection, VMF, Motion detection, Audio
detection, Network disconnection.
Playing a video/audio file
Click (start) to start playback from the beginning of
the selected file.
To freeze the movie temporarily, click (pause).
Click again to resume playback from the freeze
point.
To stop playback, click (stop).
To start playback from the beginning, click (start)
again.
Playback stops when the file is played to the end.
Playing from a specified point
Move the slider bar below the image display, and
playback will start from the position of the slider bar.
Adjusting the sound
Adjust the playing sound volume by moving the
slider bar. Move it to the left end for minimum volume,
and to the right end for maximum volume.
Click (speaker) to enable/disable sound (muting).
When sound muting is on, no sound will be heard, even
if you move the slider bar.
Saving an image
Click the (capture) icon during playback or pause
and the captured image is displayed in a pop-up dialog.
To save the image, click Save on the dialog. You can
specify the destination to which the image is to be
stored, and select the JPEG or Bitmap format.
How to change the image display size
Click × 1/4, × 1/2, × 1, × 2 or Full at the top of the image
to display the image in the selected magnification.
If you select × 1, the image is displayed in the
original image display size of the file.
The × 2 button is only available when image size is
640 × 480 (VGA) or smaller.
The selected image display size is highlighted.
