


11
GB
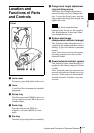
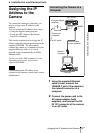
Assigning the IP Address to the Camera
Installation and Connections
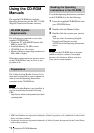
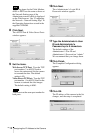
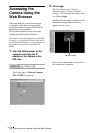
1 Insert the supplied CD-ROM
disc into your CD-ROM drive.
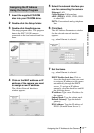
2 Double-click the Setup folder.
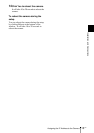
3 Double-click EasySetup.exe.
The setup program starts. The program
detects the SNC-VL10P cameras
connected on the local network and lists
them.
4 Click on the MAC address or IP
address of the camera you want
to assign a new IP address.
The <Select Network Interface>
window appears.
5 Select the network interface you
use for connecting the camera.
Ethernet: LAN
Cable Modem: Cable modem
xDSL (PPPoE): ADSL, VDSL, SDSL
or other DSL
PSTN: Conventional analog telephone
line
6 Click Next.
The <IP Address Parameters> window
for the selected network interface
appears.
e.g., when Ethernet is selected
7 Set the items.
e.g., when Ethernet is selected
DHCP Enable check box: Click to
show the check mark when you want
to assign an IP address to the camera
automatically through the DHCP
server. To assign an IP address
manually, clear the check box and fill
the following boxes.
IP address: Type a new IP address for
the camera.
Subnet Mask: Type the subnet mask.
Default Gateway: Type the default
gateway.
DNS Address: Type the IP address of
DNS 1 (Domain Name Server 1).
Assigning the IP Adress
Using the Setup Program