13
5 Click [Browse], specify the [Win95\English]
folder in the CD-ROM, and then click [OK].
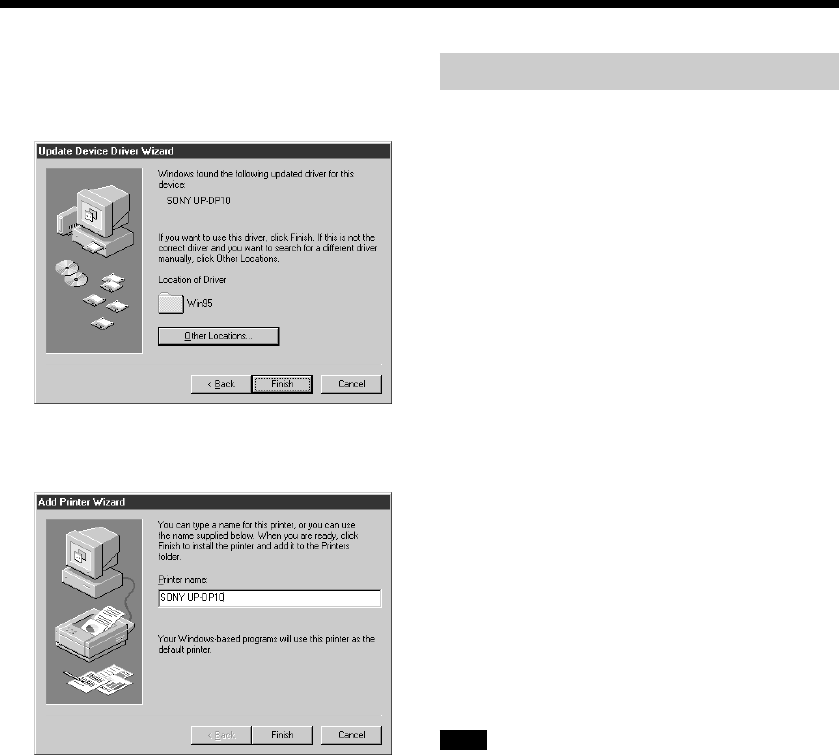
The window changes as shown below.
6 Click [Finish].
The window changes as shown below.
7 If necessary, you can type a name for the
printer in the [Printer name] field. Then,
click [Finish].
After the file is copied, the wizard ends.
Installation is now complete.
z Hint
If a message such as "Cannot find XX"
appears when the file is supposed to be
copied, click [Browse], specify the
[Win95\English] folder on the CD-ROM
again, and then click [OK].
With the Macintosh OS
Install the printer driver that is contained in the
CD-ROM that is provided with the printer.
1 Place the “PRINTER SOFTWARE UP-
DP10” CD-ROM in the Macintosh’s CD-
ROM drive.
The “PRINTER SOFTWARE” icon appears
on the desktop.
2 Double-click the “Driver” icon to open the
folder.
3 Double-click the “Chooser” icon to open the
folder.
4 Double-click the “UP-DP10 Install-E” icon
to start installation.
5 Follow the instructions displayed on the
screen in order to complete the installation
process.
6 After installation is complete, restart the
Macintosh.
Note
Before using the printer driver, please take a
moment to read the “ReadMe” file in the
“Chooser” folder.


