Making Printer Setting from your Computer
28
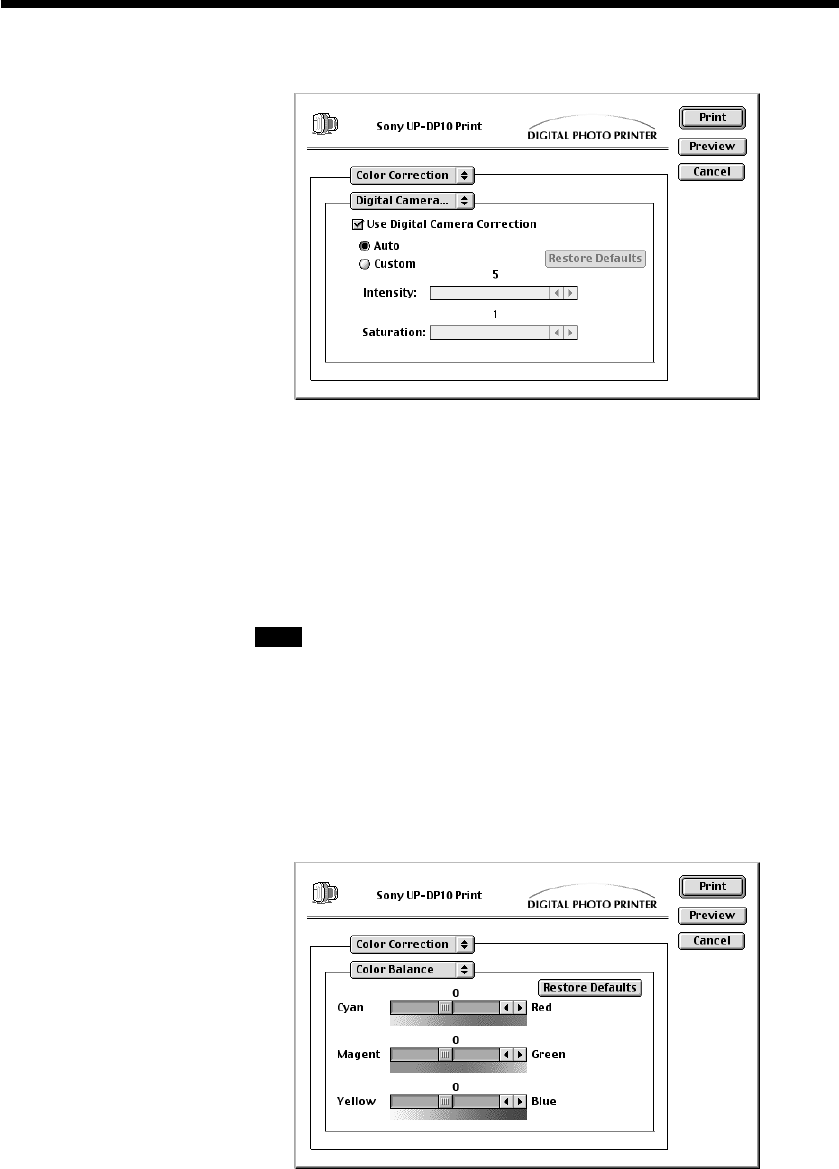
< “Digital Camera Correction”
Select this screen when printing an image from a digital camera in order
to correct the intensity and the saturation.
• If you click the “Use Digital Camera Correction” checkbox so that it is
in the checked (on) state, image correction processing that is suited for
digital camera images is performed on the image.
• Optimal processing can be performed by selecting “Auto.”
• Selecting “Custom” allows you to manually set “Intensity” and
“Saturation.”
Note
Setting “Saturation” to “0” causes the original saturation component to
be used, but setting “Intensity” to “0” does not cause the original
intensity component to be used.
• Click “Restore Defaults” to return all of the settings on this screen to
their initial values.
< “Color Balance”
Use the scroll bars on this screen to adjust the color balance of the printer.
• Click “Restore Defaults” to return all of the settings on this screen to
their initial values.
