


SVAT ELECTRONICS
now you can see
CLEARVU3 25
7.3 Prepare Your DVR
Next we will set up the DVR to connect to the internet and allow you to view online.
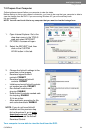
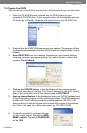
1. Place the CD-ROM that was included with the DVR system into your
computer’s CD-ROM drive. If your computer does not automatically open the
CD folder, go to Start/My Computer and double-click on the CD-ROM icon.
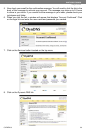
2. Drag and drop the IPEDIT.EXE program onto your desktop. This program will give
you the information needed to nd your DVR’s IP address (unique location on your
network).
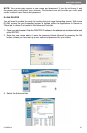
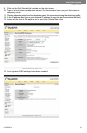
3. Open IPEDIT.EXE from your desktop. Depending on your rewall settings,
a warning message may appear asking if you want to block or unblock this
program. Click Unblock.
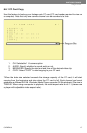
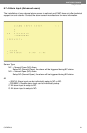
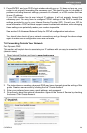
4. Click on the UPDATE button. In the top left area of the program window
you should see a set of numbers. This is the IP address of your DVR. Write it
down in the information area of this manual listed as ROUTER IP.
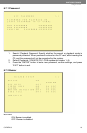
5. Open up Internet Explorer. In the Address bar, enter your DVR’s IP address found
in Step 4 followed by a space, a colon and the port number. This DVR’s default port
number is 80. Your IP address should look something like this: 192.168.0.1 :80
Some versions of Internet Explorer will not work with a space in the address
bar. If this is the case, try it without the space. eg: 192.168.0.100:80
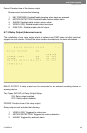
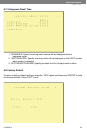
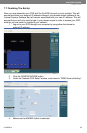
6. If entered successfully a window will open
up with a login screen. The default USER
NAME is admin. The default PASSWORD
will be 1234.