


SVAT ELECTRONICS
now you can see
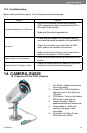
CLEARVU3 49
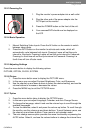
No picture/signal
- Make sure your TV/monitor is on the correct video input
channel. This is NOT channel 3. Common terms for this channel
is INPUT, AV CHANNEL, LINE 1, LINE 2 and AUX. Please use
your TV or VCR manual to correctly identify this channel.
- If your camera is connected to a VCR/DVR, make sure that
it is properly connected to your TV/monitor.
- Check all connections to make sure they are secure and
properly connected.
- Check your power supply to ensure that the camera is
powered up.
Picture is too bright
- Make sure your camera is not aimed at direct sunlight.
- Adjust the sunshade by sliding it forwards to block out
excess light.
- Make sure nothing is obstructing the CDS sensor on the
camera. If the CDS sensor is blocked, night vision mode will be
active and may produce extra light in your camera’s picture.
- Move your camera to another location.
Picture is too dark
- If using at night, make sure your camera’s subject is
no more than 15ft away (may vary based on amount of
ambient light available).
- If using during the day, your camera may not be getting
enough light. Adjust the sunshade by sliding it backwards to
let in more light.
- Check the brightness and contrast settings on your TV/monitor
- If your camera is connected to a VCR/DVR, check the
brightness and contrast settings on the VCR/DVR
- Move your camera to another location.
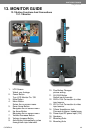
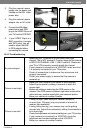
3. Plug the camera’s power
supply into the power jack
located on the 60ft video/
power wire.
4. Plug the camera’s power
adapter into an AC outlet.
5. Connect the 60ft video/
power wire’s male RCA
plug to the VIDEO IN port of
your TV/ monitor/VCR/DVR.
6. If your VIDEO IN port is a
BNC connection (common
with DVR units), you will
need to attach the BNC
to RCA adapter before
connecting the camera.
3 4
5 6
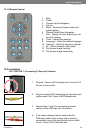
14.2.2 Troubleshooting