


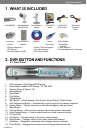
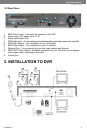

SVAT ELECTRONICS
now you can see
CLEARVU3 4
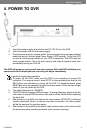
4. POWER TO DVR
1. Insert the power supply wire into the rear DC 12V Port on the DVR.
2. Insert the power cord into the power supply.
3. Plug the power cord into a power outlet. We recommend using a surge protected
power bar and/or Uninterrupted Power Supply (UPS) backup. To turn the DVR
on and off, use the power switch on your UPS or power bar. This DVR does not
have a power switch. This is for your security and helps to prevent users from
accidentally turning the DVR off.
The DVR will power on and you will see a boot screen. After the DVR initializes your
cameras should be displayed and recording will begin immediately.
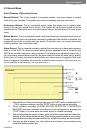
Important notes before operation
1. To power off the DVR, make sure the DVR is not recording to prevent le
corruption. If on manual record, press STOP to stop recording and wait for the
REC light to turn off before you power off the DVR. If in schedule record, press
MENU and enter the password to enter the menu screen. When the record light
turns off, you can power off the DVR.
2. The default password is 12345678.
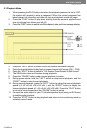
3. This DVR does not support HDD hot swap. To prevent damage, please enter the
main menu to stop all HDD activities, then power-off the device before replacing
the hard disk.
4. After power-on, the DVR auto detects the video system (NTSC/PAL) of the rst
camera connected. When no camera has been connected, the video system
will be the same as the previous setup.
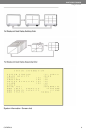
5. After power-on the system auto enters 9-split screen mode, and continues with
the previously setup recording schedule (auto resume recording)