


28
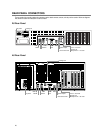
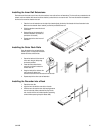
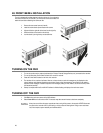
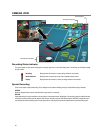
4U FRONT BEZEL INSTALLATION
The 4U is shipped with handles attached to the front of the unit. If you choose to
mount the front bezel to your recorder, you will need to remove the handles and
attach the bezel before attaching the rackmount rails.
1. Remove the two screws from each handle.
2. Install the include bezel clips and fasten with screws.
3. Align and slide the right side of the bezel into the right clip.
4. Slide the left side of the bezel into the left clip.
5. Lock the bezel by turning the key counterclockwise.
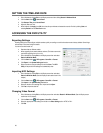
TURNING ON THE NVR
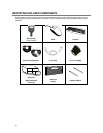
1. Turn on the monitor and any external peripherals (ex. Printers, External Storage Devices, etc.) connected to the recorder.
2. Turn on the Secondary Power Switch located in the rear of the recorder.
3. Press the Power Switch located on the front of the recorder.
4. The recorder will run a series of self-tests. After two or three minutes, a series of messages may be displayed as the
various hardware and software subsystems are activated. Under normal circumstances, users should not be asked to
respond to these messages. If asked to respond to the messages (adding a Printer, Monitor, etc for the first time) follow
the instructions carefully.
5. Startup is complete when the Surveillix NVR software is finished loading and displays the main menu screen.
TURNING OFF THE NVR
1. Click Exit on the main menu screen of the NVR software.
2. Select Power Off from the list and click OK. The recorder may take several minutes to shut down completely.
Caution Always be sure to follow the proper procedures when turning off the power to the recorder. NEVER disconnect
the power to the recorder while it is still running or in the process of shutting down. Doing so can cause data
loss, file corruption, system instability and hardware failure.