


30
SETTING THE TIME AND DATE
1. Exit to Windows by clicking Exit on the Display screen and then clicking Restart in Windows Mode.
2. Click the Start button > Control Panel.
3. Click Date and Time inside Control Panel.
4. Adjust the Date and Time.
5. When finished, click Apply, then OK, then close all open windows and restart the recorder. Do this by clicking Start and
selecting Restart from the Shut Down menu.
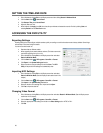
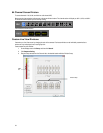
ACCESSING THE DVR UTILITY
Exporting Settings
Exporting settings can help configure multiple recorders quickly or reconfigure a unit that has been reset to factory defaults. Some things
must be kept in mind when using this feature.
You cannot use this function on:
• Recorders that are different models.
• When upgrading from certain software versions. (This feature cannot be
used when upgrading from v2.x to v3.x)
1. Exit to Windows by clicking Exit on the Display screen then and select
Restart in Windows Mode.
2. Click the Start button > All Programs > Surveillix > vFormat.
3. Click Export in the System Setting tool section.
4. Select a location to save the settings file and click Save. The DVR
Utility will export the NVR settings and automatically close.
Importing NVR Settings
1. Exit to Windows by clicking Exit on the Display screen then and select
Restart in Windows Mode. (See the Display screen section later in this
chapter)
2. Click the Start button > All Programs > Surveillix > vFormat.
3. Click Import in the System Setting Tool section.
4. Select the location of the settings file to import and click Open.
5. Click Yes to import the data file.
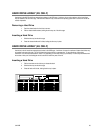
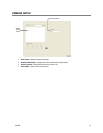
Changing Video Format
1. Exit to Windows by clicking Exit on the Display screen then and select Restart in Windows Mode. (See the Display screen
section later in this chapter)
2. Click the Start button > All Programs > Surveillix > vFormat.
3. Select the appropriate video setting from the list in the Video Setting section—NTSC or PAL.
4. Click Set.