


70
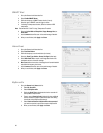
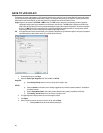
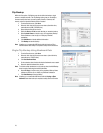
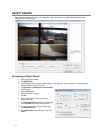
Clip Backup
Within the Save option, Clip Backup can also be utilized to backup a single
camera or multiple channels. The Clip Backup option gives you the ability to
choose a backup time frame, choose a specific camera or cameras, add
memos, and even include the Backup Viewer if needed.
1. From the Search screen, click Save.
2. Select the drive from the file tree to save data to (Hard disk drive,
removable drive (USB), CD/DVD drive).
3. Select desired cameras from the list.
4. Define the Start and End time and date that you wanted to backup.
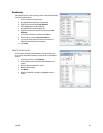
5. Select Include Viewer to include a copy of the proprietary Backup
Viewer Software to view the clip on virtually any Windows
workstation.
6. Click Add Memo to include additional information.
7. Click Backup to start the backup.
Note If backing up to a removable USB device click the Unplug or Eject
Hardware button after backup is complete to safely remove the device.
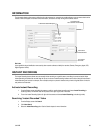
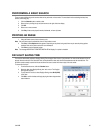
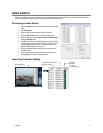
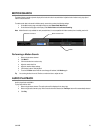
Single Clip Backup Using Bookmark Data
1. From the Search screen, click Save.
2. Select the drive from the file tree to save data to. (Hard disk drive,
removable drive, CD/DVD drive).
3. Click Use Bookmark Data.
4. On the calendar, select the date the desired bookmarks were created.
5. Select the desired bookmark from the list.
Note To include multiple bookmarks in a clip backup, select the Multi Backup
check box before selecting the desired bookmarks.
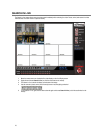
6. Select BV Copy to include a copy of the proprietary Backup Viewer
software to view the clip on virtually any Windows workstation.
7. Click Start Backup to start the backup.
Note If backing up to a removable USB device click the Unplug or Eject
Hardware button after backup is complete to safely remove the device.