


16
Playing Back/Deleting
Photographed Images
Connecting to the
PC
Other Useful
Information
Taking Photographs
Getting Ready
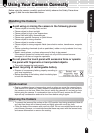
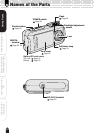
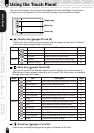
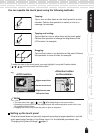
Using the Touch Panel
You can use the keys on the touch panel besides the Direction and Mode (hard) buttons
to perform various operations. For the individual functions, see the reference pages.
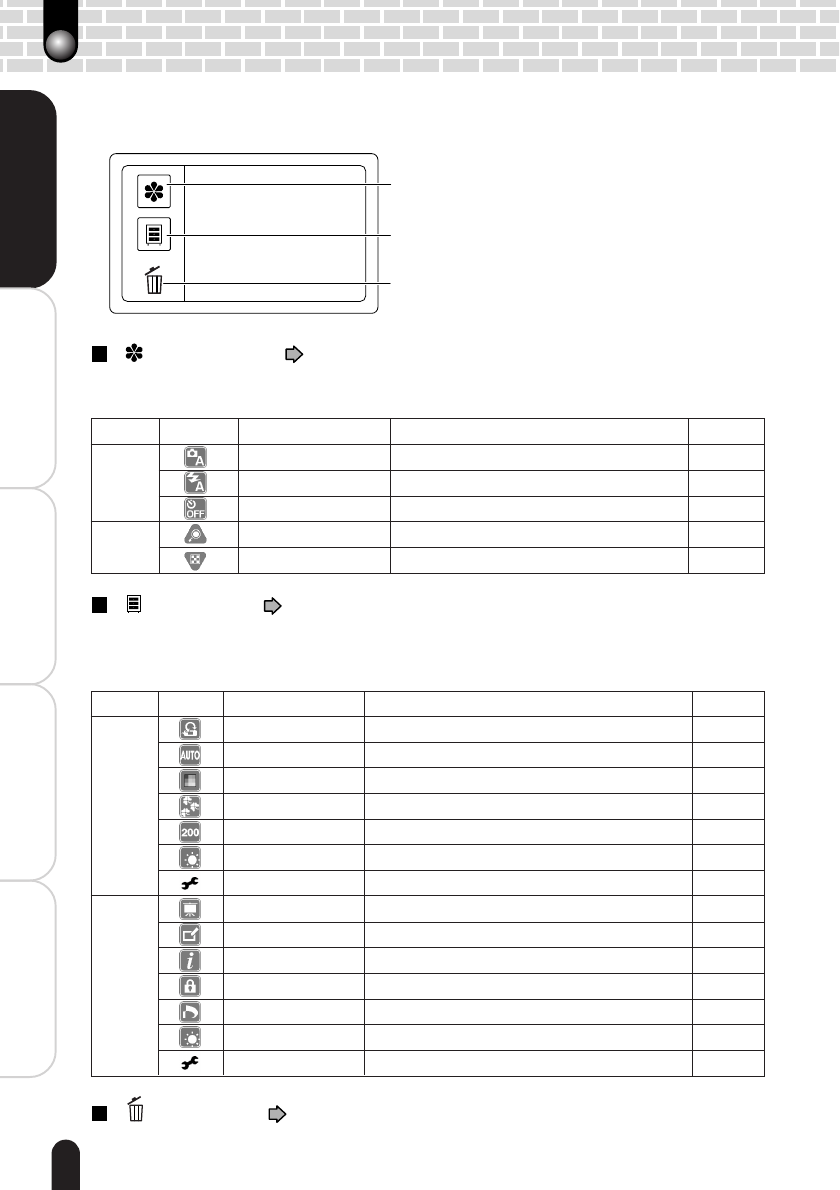
[ ] Display key ( pages 29 and 40)
Tapping this key switches between display and non-display of the icons. A different
set of icons appears depending on the mode.
[ ] Menu key ( pages 36 and 60)
Tapping this key switches between display and non-display of the menu screen. A
different set of menu appears depending on the mode. The Setup menu is selectable
through each of the two modes.
[ ] Erase key ( pages 47 and 48)
Use this key to delete photographed images or initialize the SD card.
Menu key
Display key
Erase key
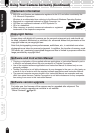
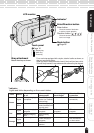
Mode Icon Item Description Page
Photography
Preview
Select an image display method for post-photography confirmation.
37
White balance Select a color correction mode. 37
Color Select a color mode for photography. 37
Quality Select the image size and quality. 37
ISO Select an ISO sensitivity level. 37
LCD brightness Select a brightness level for the LCD monitor. 37
Setup Customize the system settings. 60
Playback
Slideshow Continuously displays photographed images. 43
Paint Allows handwriting on the current image. 44
Information
Shows information such as the photography date and size of the current image.
–
Protect Protects important images. 46
DPOF Allows DPOF settings. 62
LCD brightness Select a brightness level for the LCD monitor. 37
Setup Customize the system settings. 60
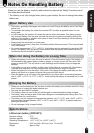
Mode Icon Item Description Page
Photography
Scene mode
Select a situation in which photographs are taken.
30
Flashing Select how the flash should function. 32
Self-timer Select the time for the self-timer. 34
Playback
Zooming Enlarges and plays back a single image. 42
Thumbnail display
Reduces and simultaneously displays multiple images.
41