


AVerMedia User’s Manual
EYES Pro/MP2016/MP3000/MP5000
63
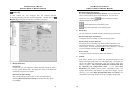
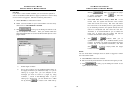
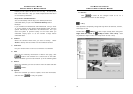
4. Task
Here you can select the task you’re scheduling for.
Monitor
If you select Monitor, the system will activate this button
on the main menu when the scheduled time is due. The system
will act according to the recording mode set in the
Monitoring
section. Meanwhile, the system will also monitor the event
conditions you set in the
Alarm section for the cameras and
sensors and trigger the alarm accordingly.
Record
If you select Record as the task, the system will have the chosen
cameras to start recording at the scheduled time. The task you set
here enjoys higher priority than the recording mode you set for
each camera. That means, even if you have set the camera to
Record when motion detected or Don’t record in the
Monitoring section, the camera will still start recording at the
scheduled time.
Enable Network Server
When this is selected to be the task, the system will load network
server
based on your settings in the Networking
section and start the remote monitoring for transmitting cameras.
Alarm
If Alarm box is checked, the Alarm will execute according to the
Alarm section you plan as long as the Time is due. To exercise the
prior privilege of Scheduler, the Alarm will perform by the
scheduled time even though it is not enabled in Alarm section of
System Configuration.
AVerMedia User’s Manual
EYES Pro/MP2016/MP3000/MP5000
64
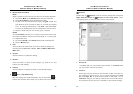
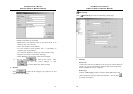
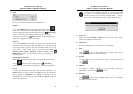
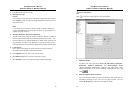
If the time of the schedule you set for a task overlaps with
the time of an existing schedule for the same task, the
system will give you a warning message below. In short,
the time of 2 schedules for the same task cannot overlap.
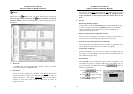
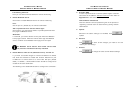
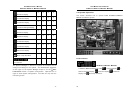
5. Cameras
When you select Record or Alarm to be the task, you need to
select the recording cameras here.
6. Comment
Put your remarks here as a reminder of any schedule.
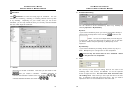
7. Add
Click
to add a new schedule to the table after all the
necessary information is filled in this page.
8. Delete
You can select any task you want to remove from the table and
click
.
9. Update
To update a schedule, select it from the table, revise the
information, and then click
to verify.
10. Restore
Click
to abort all the changes made so far for a schedule
and restore its last settings.