


AVerMedia User’s Manual
EYES Pro/MP2016/MP3000/MP5000
111
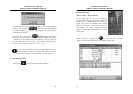
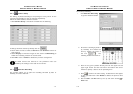
6.2.3 Camera Setup
The setting is placed according to the privilege of every server for the
cameras corresponding to the 16 channels respectively.
Follow the tasks below to finish this section:
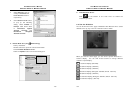
1. Click Camera Setup. It will show a window like the following:
2. Change channel’s names by directly click on .
3. Arrow down the list to select the Server’s and Camera’s names for
each channel.
4. Check Display to show the images on the screen and Recording to
enable the recording function for each channel.
5. Click OK to save or Cancel to delete the previous arrangement.
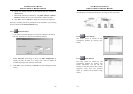
The listed servers and cameras in the pull-down menu are
decided by the settings of the each of the servers.
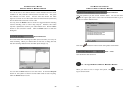
6.2.4
Schedule Recording
The function allows you to plan the recording schedule by date or
weekday for all the channels.
AVerMedia User’s Manual
EYES Pro/MP2016/MP3000/MP5000
112
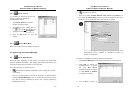
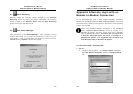
Do the steps following:
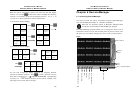
1. Click Schedule Recording
to get the window besides:
2. Check the recording by date or
by weekday and choose the
time by clicking the arrow of
the box
. The
following window will show as:
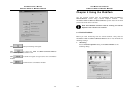
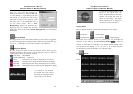
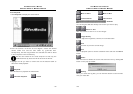
3. Click on the yy/mm position directly and use the upper left and
upper right arrows and the red circle in the bottom left corner
window to specify a date to be an operating time.
4. Click
to confirm the time setting. A settled time will appear
on the right blank box. Click Delete to delete the previous time
setting.
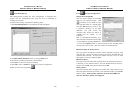
5. Set the Start and End time by the up and down arrows
in
Time field.