


Preparing the Camcorder
32
• We recommend that you power the camcorder from a household power outlet using the compact power
adapter or use a sufficiently charged battery pack.
• When using an optional EF Extender, remove the Extender before performing the procedure.
Attaching and Removing the Handle Unit
The handle unit extends the camcorder’s audio capabilities, adding XLR terminals as well as a built-in stereo
microphone.
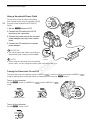
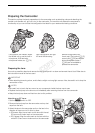
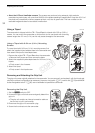
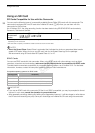
Attaching the Handle Unit
1Set the Q switch to OFF.
2 Insert the attachment base at the bottom of the handle
unit to the camcorder’s accessory shoe.
3 Tighten the handle unit’s lock screw while gently pressing
it down.
4 Connect the handle unit’s cable to the camcorder’s EXT
terminal, aligning the
Í marks.
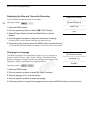
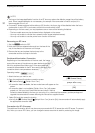
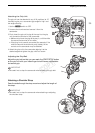
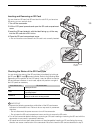
Removing the Handle Unit
1Set the Q switch to OFF.
2 Disconnect the handle unit's cable.
• Pull back the metallic tip of the cable to release the
cable and then disconnect the cable from the terminal.
3 Loosen the handle unit's lock screw and gently slide out
the handle unit from the accessory shoe.
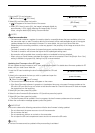
NOTES
• You can use the accessory shoe or the socket for 0.64 cm (1/4 in.) screws on the handle unit to attach a
variety of commercially available accessories.
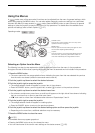
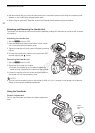
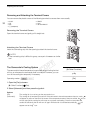
Using the Viewfinder
Dioptric Adjustment
Turn on the camcorder and adjust the dioptric adjustment
lever.
Dioptric
adjustment
lever
COPY