


Preparing the Camcorder
34
• About the LCD and viewfinder screens: The screens are produced using extremely high-precision
manufacturing techniques, with more than 99.99% of the pixels operating to specification. Less than 0.01% of
the pixels may occasionally misfire or appear as black, red, blue or green dots. This has no effect on the
recorded image and does not constitute a malfunction.
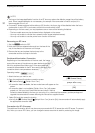
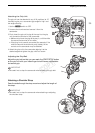
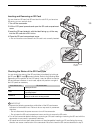
Using a Tripod
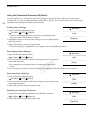
The camcorder is shipped with the TB-1 Tripod Base for tripods with 0.95 cm (3/8 in.)
screws. You can mount the camcorder on a tripod but do not use tripods with mounting
screws longer than 5.5 mm (0.2 in.) as this may cause damage to the camcorder.
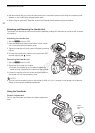
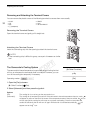
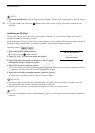
Using a Tripod with 0.64 cm (1/4 in.) Mounting
Screws
To use a tripod with 0.64 cm (1/4 in.) mounting screws, first
attach the supplied tripod adapter base to the camcorder and
then attach the tripod to the adapter base.
1 Remove the original TB-1 Tripod Base from the camcorder.
• Remove the 4 screws and then remove the base.
2 Attach the supplied tripod adapter base for 0.64 cm (1/4 in.)
tripods.
• Firmly screw in the 4 screws.
3 Attach the tripod.
• Firmly screw in the tripod screw.
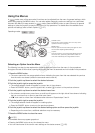
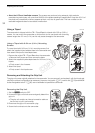
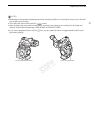
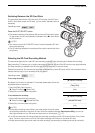
Removing and Attaching the Grip Unit
The grip unit comes originally attached to the camcorder. You can remove it and replace it with the thumb rest
should the minimal configuration be necessary. However, the joystick (A 27), control dial (A 59) and MAGN.
button/Assignable button 7 (A 85) are not available to operate the camcorder.
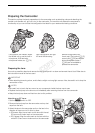
Removing the Grip Unit
1Set the Q switch to OFF.
2 Unscrew the grip unit’s lock screw and gently detach the
grip unit.
• The grip unit contains an internal connection cable so
be sure not to pull it too forcefully.
3 Disconnect the grip unit’s connection plug.
4 Screw the thumb rest onto the camcorder.
5.5 mm
COPY