


20
E
Mastering
the Basics
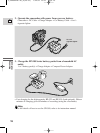
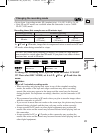
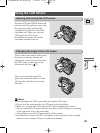
3. Load a cassette ( 17).
4. Slide the program selector to [.
• This selects the camcorder’s Easy Recording program. It allows you to
simply point and shoot without making any manual adjustments ( 58).
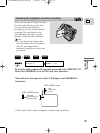
5. Press and release the start/stop button once to begin recording.
• For still image recording to a cassette, see p. 51.
• The tally lamp flashes rapidly and REC appears in the display.
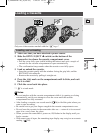
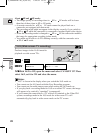
6. Press and release the start/stop button again to pause recording.
• The camcorder returns to record pause mode and PAUSE reappears in the
display.
• You can stop and restart recording as often as you like by pressing the
start/stop button.
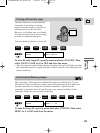
Note:
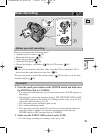
• After loading a cassette, start recording when the tape counter has stopped.
• Replace the lens cap.
• Return the viewfinder to its retracted position.
• Return the LCD screen flush to the camcorder body.
• Unload the cassette.
• Turn the POWER switch to OFF.
• Disconnect the power source.
Notes:
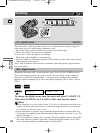
• To check that the camcorder is recording correctly, make a test recording first.
• Before making important recordings, clean the video heads using a Canon
DVM-CL Digital Video Head Cleaning Cassette or a commercially available
digital video head cleaning cassette.
• To close the LCD panel, rotate it vertically until the screen faces you, then push
it in flat against the side of the camcorder until it clicks securely.
• You cannot monitor the sound from the speaker when recording.
• For tips on how to make better videos, see p. 34.
• For extra recording time, set REC MODE to any mode other than SP ( 21).
• Do not hold the camcorder by the LCD panel, viewfinder, battery pack or built-
in flash.
When you have finished recording
2_OPTURA100 MC_E(09-35) 7/24/01 13:31 Page 20