169
EDITING IMAGES
4. Use [S] and [T] to select a white balance
setting, and then press [SET] to apply it.
• Normally, the initially selected white balance setting on
the above menu is the one that was u sed when you
originally recorded the image. If you used the “Auto” or
“Manual” white balance setting when you recorded the
image, “Cancel” will be selected (page 126).
• If you select the same white balance setting as the one
you selected when you originally recorded the image,
pressing [SET] will exit the white balance adjustment
menu without changing the image.
IMPORTANT!
• Adjusting the white balance of an image creates a new
image with the new white balance setting. The original
image also remains in memory.
• When you display an image whose white balance has been
adjusted on the camera’s monitor screen, the date and time
indicates when the image was originally recorded, not
when the white balance was adjusted.
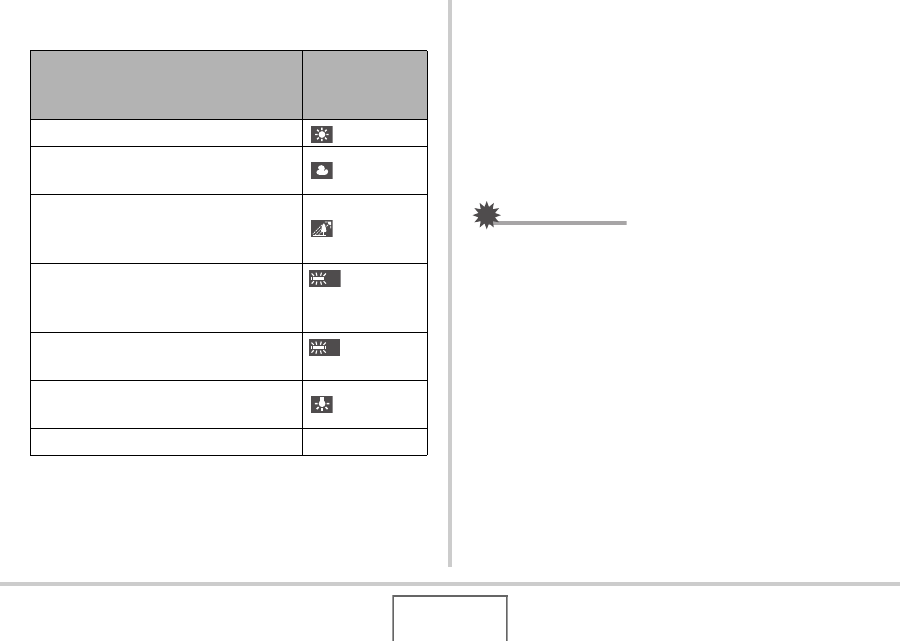
When you want the image to appear
like it was recorded under these
conditions:
Select this
setting:
Outdoors, fair weather (Daylight)
Outdoors, cloudy to rain, in tree shade,
etc.
(Overcast)
In a location where color temperature is
very high, like in the shade of a
building, etc.
(Shade)
Under white or daylight white
fluorescent lighting, without
suppressing color cast
(Day
White
Fluorescent)
Under daylight fluorescent lighting,
while suppressing color cast
(Daylight
Fluorescent)
Under incandescent lighting, while
suppressing color cast
(Tungsten)
Cancel white balance adjustment Cancel
N
D


