97
Software
Installation
96
9
Click the [Continue] button.
●
!
The software is installed in the “Applications” folder on the disk you want to install in.
10
Click the [Install (upgrade)] button.
11
Enter your administrator name and password and then click the [OK] button.
12
An installation progress window appears. (Installation may take several minutes)
14
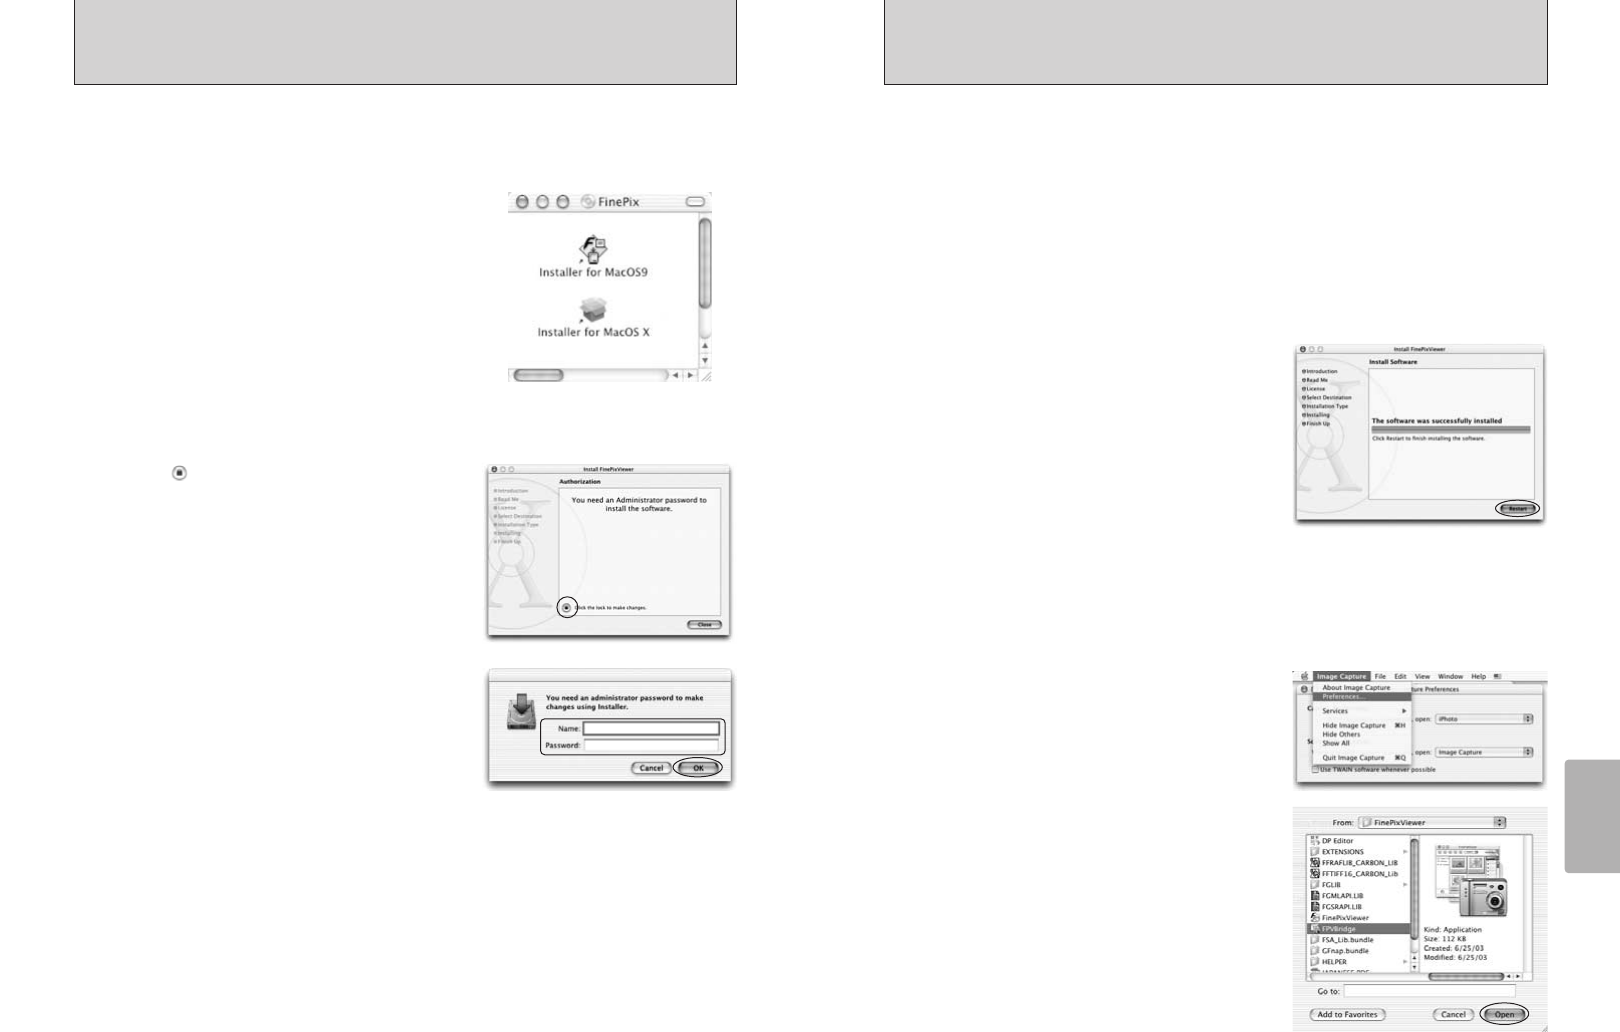
Launch “Image Capture” from the “Applications” folder.
13
When you have completed the installation, click the
[Restart] button.
15
Change the ImageCapture settings.
(OS X 10.1.5)
(1) Select “Other...” from “Hot plug Action”.
(OS X 10.2 or later)
(1) Select “Preferenes...” from the “Image Capture”
menu.
(2) Select “Other...” from “When a camera is
connected, open”.
16
Select “FPVBridge” from “FinePixViewer” folder in
the “Applications” folder and click the “Open” button.
17
Quit ImageCapture.
5.4 INSTALLATION ON A Mac OS X
8
Click the [Continue] button in the “Software License Agreement” window.
FinePixViewer and RAW FILE CONVERTER LE are installed on Mac OS X.
1
Turn your Macintosh on and start up Mac OS X. Do not launch any other applications.
2
Insert the enclosed CD-ROM into the CD-ROM
drive. The “FinePix” window opens.
●
!
If the “FinePix” window does not open, double-click the CD-
ROM icon.
3
Double-click “Installer for MacOS X”.
4
Click the “ ” icon.
(This operation is not required on version 10.2 (or
later).)
5
Enter the administrator name and password. Then
click the [OK] button.
●
!
The window displayed in Mac OS X is slightly different.
6
Click the [Continue] button.
7
Quit any other programs that are running and then click the [Continue] button.
