


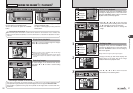


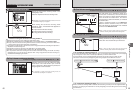
d FLASH PHOTOGRAPHY
PHOTOGRAPHY FUNCTIONS
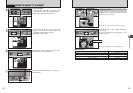
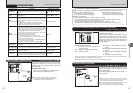
e MACRO
(
CLOSE-UP
)
PHOTOGRAPHY FUNCTIONS
34 35
Advanced Features
3
NNN
121212
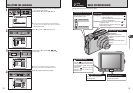
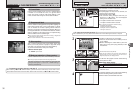
Select Macro mode to take close-up shots.
1Set the Mode switch to “q”.
2Press the “e (d)” button. “e” appears on the
LCD monitor indicating that you can take close-
up shots.
To cancel Macro mode, press the “e (d)”
button again.
h Focal range
Approx. 9 cm to 80 cm (3.5 in. to 2.6 ft.)
(wide-angle)
Approx. 39 cm to 80 cm (1.3 ft. to 2.6 ft.)
(Telephoto)
h Effective flash range
Approx. 30 cm to 80 cm (1.0 ft. to 2.6 ft.)
●
!
Any of the following cancels Macro mode:
i Changing the Mode switch setting
i Turning the camera off
●
!
Use a tripod to prevent camera shake when shooting in the
dark (when “
|” appears).
●
!
Selecting MULTI in the AF mode, the focusing position
remains near the center of the LCD monitor.
01 02
NNN
121212
01 02
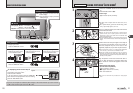
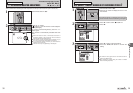
Choose from 6 flash modes according to the type
of shot.
1Set the Mode switch to “q”.
2The flash setting changes each time you press
the “d (c)” button. The last displayed setting is
the selected mode .
h Effective flash range (
û: AUTO)
Wide-angle: approx. 60 cm to 4.4 m
(2.0 ft. to 14.4 ft.)
Telephoto: approx. 60 cm to 2.3 m
(2.0 ft. to 7.5 ft.)
●
!
The available flash modes are limited depending on the
Photography mode selected (➡P.33).
●
!
If the flash is used in dusty conditions or when it is snowing,
white dots may appear in the image due to flash reflecting off
dust particles or snowflakes. Use Suppressed flash mode to
fix the problem.
●
!
The flash charging time may increase when the battery is low
on charge.
●
!
When taking a picture using the flash, the image may
disappear and go dark briefly due to flash charging. The
indicator lamp blinks orange during charging.
●
!
The flash fires several times (pre-flashes and the main flash).
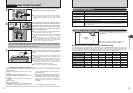
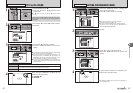
AUTO Auto flash
(
no icon
)
Use this mode for ordinary photography. The flash fires as
required by the shooting conditions.
●
!
If pressing the shutter button while the flash is charging, the picture will
be taken without the flash.
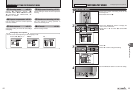
b
Red-eye reduction
Use this mode to guarantee that the subject’s eyes appear
normal when taking pictures of people in low-light
conditions. The flash fires a pre-flash just before the picture
is taken and then fires again to take the actual picture. The
flash fires as required by the shooting conditions.
●
!
If pressing the shutter button while the flash is charging, the picture will
be taken without the flash.
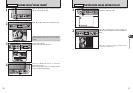
◆
Red-eye effect
◆
When using the flash to take a picture of people in low-light conditions, their eyes sometimes
appear red in the picture. This is caused by the light of the flash reflecting off the inside of the eye.
Use Red-eye reduction flash to minimize the likelihood of this effect.
Take the following measures to make Red-eye reduction more effective:
h Get the subjects to look at the camera. h Get as close as possible to the subjects.
Continued
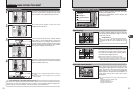
When pressing the shutter button down
halfway, “
∑” appears on the LCD
monitor before the flash fires.
Available Photography modes:
AUTO, À, s
Available Photography modes:
AUTO, À&d, m, ., ©, s