USB socketUSB socketUSB socketUSB socketUSB socketUSB socket
93
Viewing Images
6
92
The “Connecting to a PC” section explains how to connect the camera to your PC using the USB
cable (included) and describes the functions you can use once the camera and PC are connected.
If the power cuts out during data transmission, the data will not be transmitted correctly. Always use the
AC power adapter when connecting the camera to a PC.
Refer to Section 5 the first time you connect the camera to your PC.
Install the software first. Do not connect the camera to the PC before installing
all the software.
This mode provides a simple way to read images from an xD-Picture Card and store images onto
an xD-Picture Card.
CD-ROM
(Software for FinePix
CX)
DSC
(
Mass storage device
)
mode
6.3.1
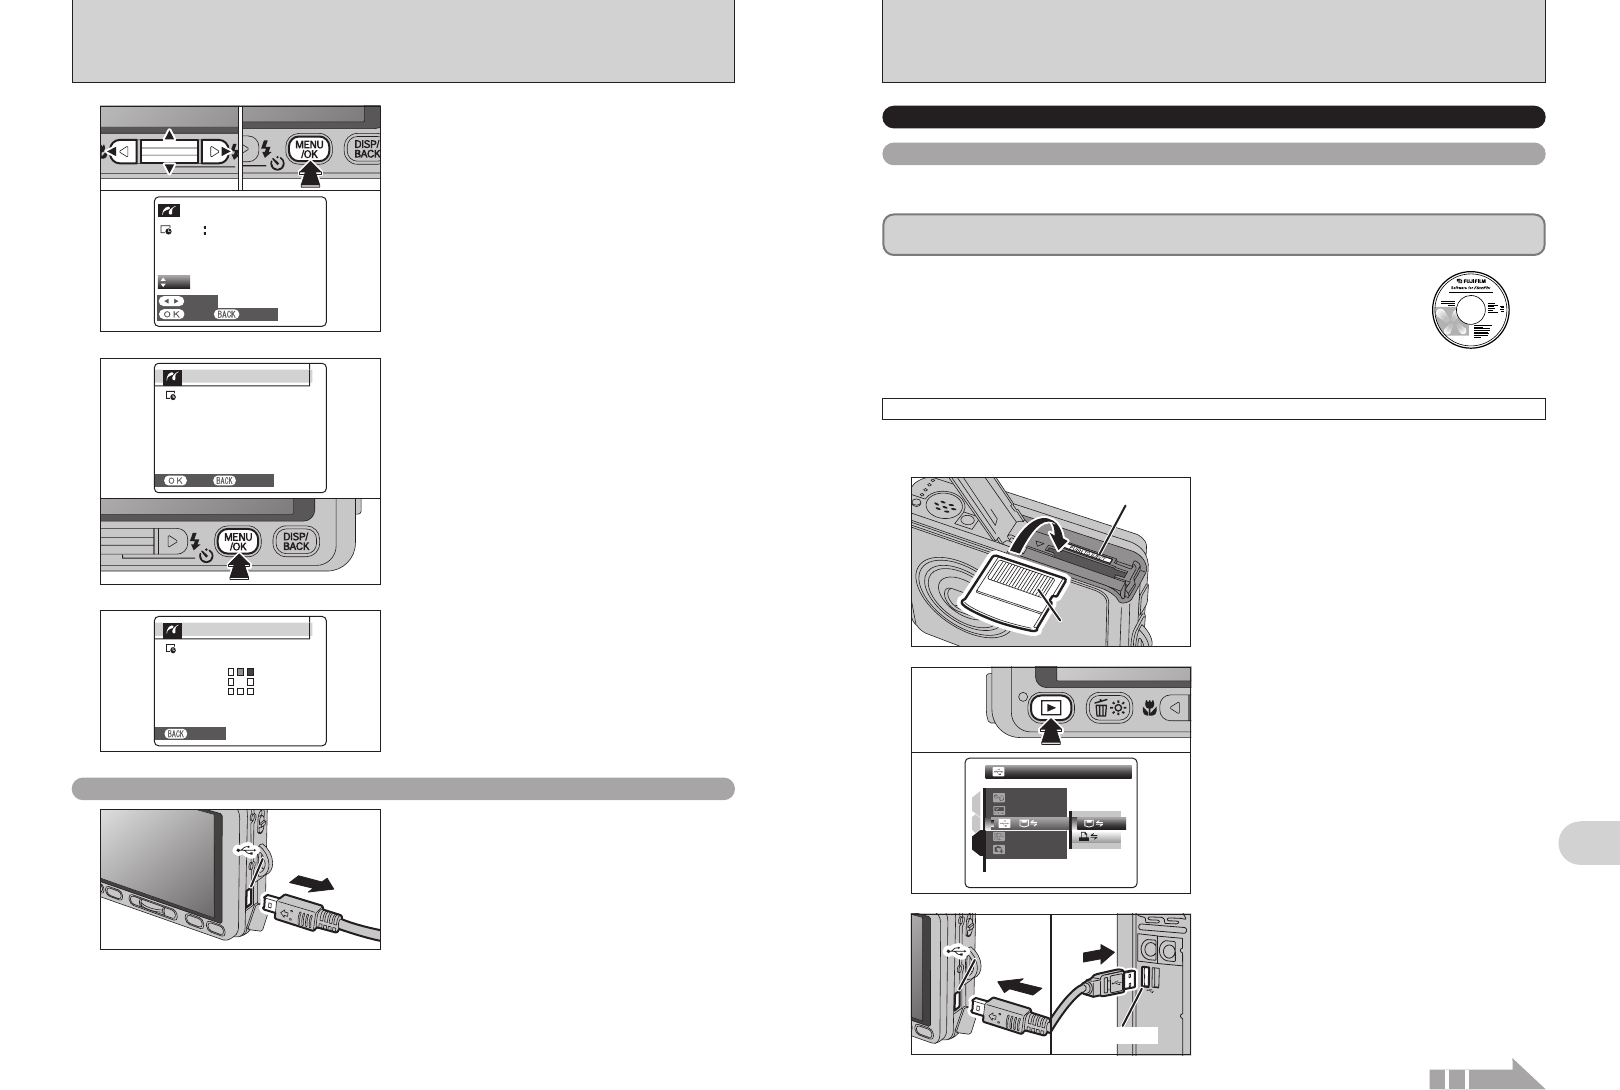
Connecting to a PC
1
Insert an xD-Picture Card into the camera.
Gold markingGold marking
Gold contact areaGold contact area
1Press the “w” button for about 1 second to turn
the camera on in Playback mode.
2Select “¶” DSC in “ò” USB MODE in the
“˜” SET-UP menu (➡P.78).
3Turn the camera off.
2
DSCDSC
ENGLISHENGLISH
SETSET
NTSCNTSC
1
3
2
:
:
:
:
:
OKOK
01
02
●
!
Movie images cannot be printed.
●
!
Images photographed with a camera other than FinePix V10
may not be printed.
5
1Press “d” or “c” to display the frame (file) for
which you want to specify PRINT settings.
2Press “a” or “b” to set a value up to 99 as the
number of copies of the frame (file) to be printed.
For frames (files) that you do not want printed,
set the number of prints to 0 (zero).
To specify more PRINT settings, repeat steps 1
and 2.
3Always press the “MENU/OK” button after the
settings are completed.
YESY E S
CANCELC A N C E L
FRAMEF R A M E
TOTALT O TA L
00009000090000900009
SHEETSS H E E T S
01
01 02 03
CAMERA CONNECTION
Disconnecting the printer
1Check that “PRINTING” is not displayed on the
camera’s screen.
2Turn the camera off. Unplug the USB cable
(included).
USB socketUSB socketUSB socketUSB socketUSB socketUSB socket
●
!
Press the “DISP/BACK” button to cancel the printing.
Depending on the printer, the printing may not be canceled
immediately or printing may stop midway through. When
printing stops midway, briefly turn the camera off and then on
again.
Printer starts printing the specified number of
prints.
7
PRINTINGPRINTING
SHEETSSHEETS
CANCELCANCEL
1/91/9
6
“PRINT OK?” appears on the LCD monitor.
Press the “MENU/OK” button to begin printing.
PRINT OK?PRINT OK?
SHEETSSHEETS
TOTALTOTAL
:
9 9
YESYES CANCELCANCEL
1Turn your PC on.
2Connect the camera to the PC using the USB
cable (included).
3
●
!
Make sure that the USB cable (included) is connected
correctly and pushed in.
Continued
6.3 CONNECTING TO A PC


