


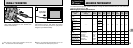
39
3
38
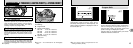
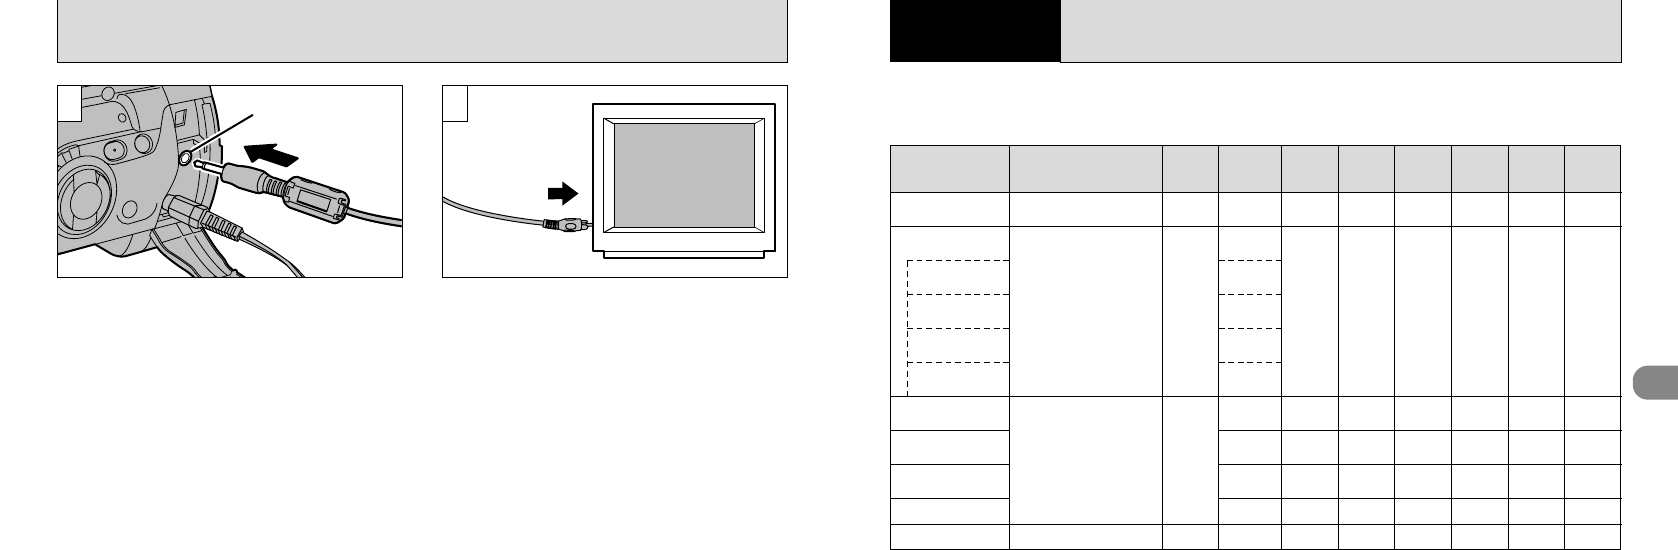
USING A TV MONITOR
VIDEO OUT socket
To the video
input socket
1 2
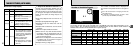
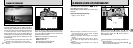
% Auto
(➡P.40)
____
Photography
mode
Accessible menu
settings
Factory
default
Flash
Photography
(
P.49
)
Macro
Photography
(
P.53
)
AE lock
(
P.54
)
Exposure
Compensation
(
P.55
)
MF
(
P.56
)
Continuous
Shooting
(
P.59
)
Self-Timer
Photography
(
P.60
)
____
A
M
,
Z
,
M
,
8
OO
✕
OOO
____
Flash Brightness Adjustment
White Balance
Photometry
Sensitivity
Auto Bracketing
Sharpness
External Flash
____
0
AUTO
MULTI
200
OFF
NORMAL
OFF
____ ____
T Portrait
(➡P.41)
A
M
,
Z
,
M
,
8
6
Landscape
(➡P.41)
a
D Sports
(➡P.41)
A
M
,
M
W Night Scene
(➡P.41)
8
,
å
5 Programed Auto
(➡P.42)
Z
,
M
,
8
,
å
✕
O
✕
OOO
OOOOOO
7 Shutter-priority
Auto (➡P.42)
Z
,
M
OOOOOO
9 Aperture-priority
Auto (➡P.42)
Z
,
M
,
8
,
å
OOOOOO
4 Manual (➡P.44)
Z
,
M
O
✕✕
OOO
. Movie (➡P.46)
✕✕✕✕✕✕✕
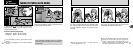
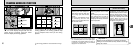
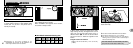
Switch off the camera and the TV. Plug the
video cable (provided) into the “VIDEO OUT”
socket on the camera.
Plug the other end of the cable into the video
input socket on the TV. Then switch the camera
and TV on and take pictures or play back
images as you would normally.
●
!
If there is a power outlet available, connect the
AC-5V/AC-5VH AC Power Adapter.
●
!
Refer to the instructions provided with your TV for
more information on video input for your TV.
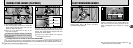
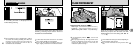
The Advanced Photography section introduces a range of camera functions that you can access by
setting the Mode switch to “0”.
■
Photography mode specifications
3
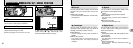
Advanced Features
Photography
ADVANCED PHOTOGRAPHY
✽
The flash cannot be used when “R” Continuous Shooting or “S” Auto Bracketing is selected.
~
Scene Position
(➡P.40)