


50 51
Advanced Features
3
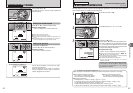
1
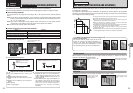
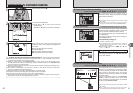
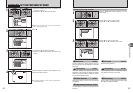
Set the Power switch to “q”.
2
1Hold down the “f” button.
2Press “d” or “c” to select the Continuous
shooting mode.
Release the “f” button to confirm your selection.
3
When setting the Continuous shooting mode
(except for “OFF”), the selected mode appears on
the screen.
f: Top 3-frame continuous shooting
j: Auto bracketing
k: Final 3-frame continuous shooting
h: Long-period continuous shooting
12
NN
250
F
3.2
ISOISO
200
01 02
OFFO F F
12
N
250
F
3.2
ISOISO
200
f CONTINUOUS SHOOTING
PHOTOGRAPHY FUNCTIONS
◆
Notes on using the Continuous shooting modes
◆
h Shooting continues as long as holding the shutter button down. In auto bracketing mode however,
just press the shutter button once to shoot 3 frames.
h If there is limited space on the xD-Picture Card, as many frames as can be recorded on the
available space are shot. When auto bracketing, if there is insufficient space on the xD-Picture Card
to record 3 frames, no pictures are taken.
h The focus is determined in the first frame and cannot be changed in mid-sequence (excluding Long-
period continuous shooting).
h The exposure is determined in the first frame, however, in Long-period continuous shooting the
exposure is adjusted for the scene being shot.
h The speed of continuous shooting varies depending on the shutter speed.
h The speed of continuous shooting does not change with the quality setting.
h The flash cannot be used as the flash mode is set to Suppressed flash.
h For top 3-frame continuous shooting, final 3-frame continuous shooting and pictures taken using auto
bracketing, the results are always displayed after you shoot.
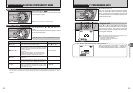
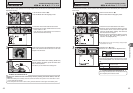
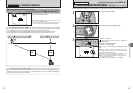
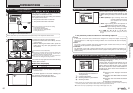
This mode shoots up to 3 frames (max. 2
frames/sec.). When taking the pictures, the images
appear and are recorded.
●
!
Top 3-frame continuous shooting cannot be used in the “r”
Movie mode.
●
!
The maximum file recording time using the continuous
shooting is 5 seconds when recording in xD-Picture Card.
STORINGSTORING
f
Top 3-frame continuous shooting
Available Photography modes: B, √, À, U, ,, /, N, M, <, >
Press the “MENU/OK” button to display the menu
and change the setting in the “Á” BRACKETING
menu option (➡P.65).
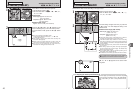
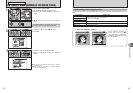
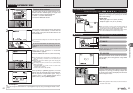
Changing the setting (exposure range)
BRACKETINGBRACKETING
1
2
: :
STDSTD
1
3
EVEVEVEV
1
3
EVEV
EVEV
2
3
1 1
:
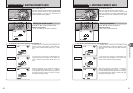
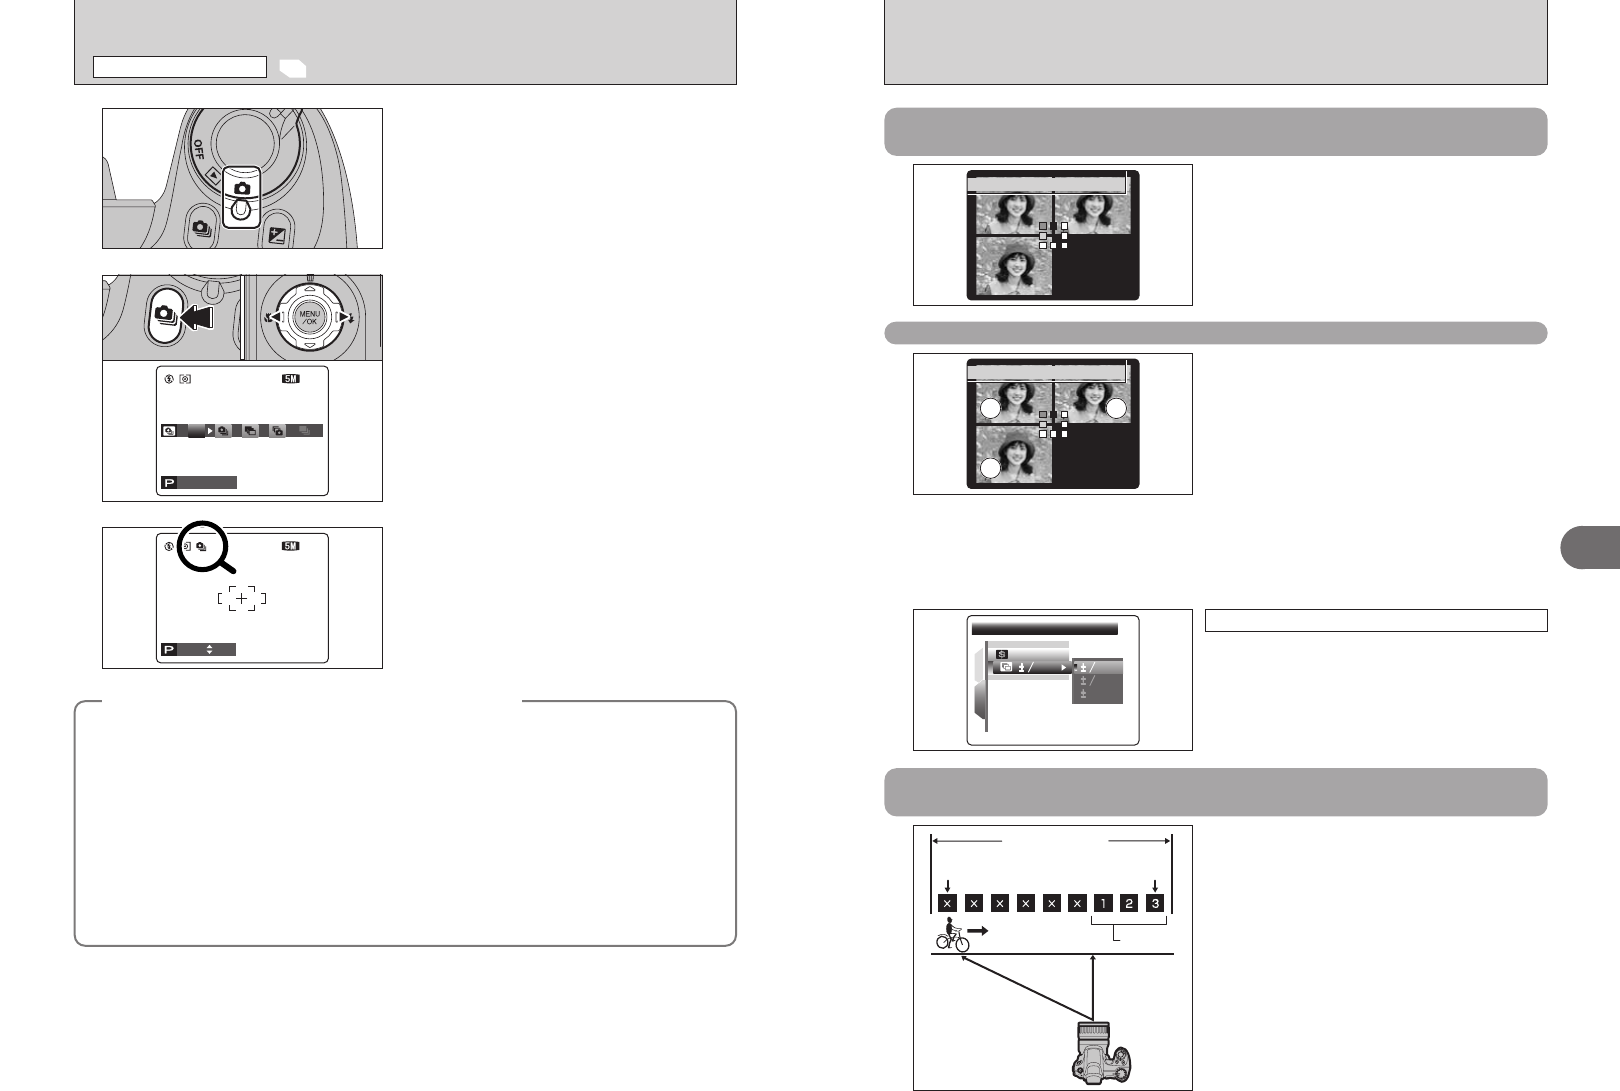
This mode shoots the same image with different
exposure settings. Bracketing shoots 3 continuous
frames, each with a different exposure setting.
A is correctly exposed, B is overexposed and C
is underexposed.
The settings (exposure range) can be changed in
the photography menu.
hAuto bracketing settings (3)
±1/3 EV, ±2/3 EV, ±1 EV
●
!
If the underexposed or overexposed frame is outside the
camera’s control range, the picture is not taken with the
specified setting increments.
●
!
Auto bracketing cannot be used in “B”, “√”, “À”, “U”,
“
,”, “/” or “r” mode.
A
C
B
STORINGSTORING
j
Auto bracketing
Available Photography modes:
N, M, <, >
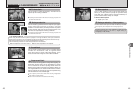
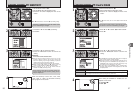
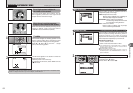
Press shutter
button
Max. 40 shots
3 frames
Release shutter
button
This mode allows you to release the shutter up to
40 times (max. 2 frames/sec.) and record the last 3
frames. If you take your finger off the shutter button
before 40 shots have been taken, the camera
records the final 3 frames shot before you released
the shutter button.
If there is insufficient space on the xD-Picture
Card, the camera records as many of the shots
taken just before the shutter button was released
as will fit on the xD-Picture Card.
●
!
Final 3-frame continuous shooting cannot be used in the “r”
Movie mode.
●
!
Only 1 frame can be shot when using the Final 3-frame
continuous shooting mode and Self-timer mode together.
k Final 3-frame continuous shooting
Available Photography modes: B, √, À, U, ,, /, N, M, <, >