


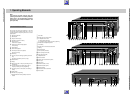

GV44…, GV45…, GV46… Allgemeiner Teil / General
GRUNDIG Service-Technik 1 - 37
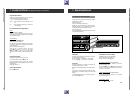
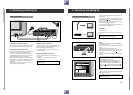
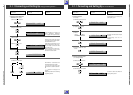
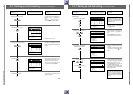
2.1 Connecting and Setting Up Tuning to TV Stations
Press these buttons on the
remote control Explanations
You will see this in the display
of your recorder
4. Starting the ATS tuning function
“
ATS ,
The ATS tuning function starts and the
scrolling symbol » « indicates that
the recorder is searching.
The recorder searches for all channels
on which TV stations are broadcasting,
sorts, and stores them.
After a short period of time, the re-
corder has completed the ATS tuning
function and the first programme posi-
tion appears in the display.
»--- « appears in the display of the
recorder and you must enter the neces-
sary VIDEO Plus + code number.
The VIDEO Plus + code numbers must
be entered as three-digit numbers.
If you make an incorrect entry, press
the
ƒ
button to delete the code num-
ber.
»
-
--
« appears in the display of the
recorder.
Repeat this procedure for the remaining
programme positions.
Once you have entered the VIDEO Plus+
codes for each of the programme posi-
tions, »
OK
« appears in the display of
the recorder.
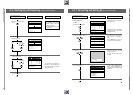
6. Checking the TV stations
a) Select a programme position
S
or
A
,
b) Terminate the adjustment
¢
Ǽ
,
Now check to see if you are satisfied
with the order in which the TV stations
are allocated.
5. Enter required three digit
VIDEO Plus + code number
for the station
1.... 0
‚
88 88:888 I 88:8–––
PROG
SEC PAL
SAT
START
C +
DATE
88 88:8882 88:8–––
PROG
SEC PAL
SAT
START
C +
DATE
STOP
88 88:888 I 88:800 I
PROG
SECPAL
SAT
START
C +
DATE
STOP
88 88:8882 88:CASS
PROG
SEC PAL
SAT
START
C +
DATE
STOP
ATS
+
88:8888 88:88:88
PROG
SEC PAL
SAT
START
C +
DATE
STOP
VPS
PDC
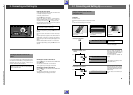
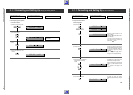
2.1.1 Connecting and Setting Up for sets with ShowView
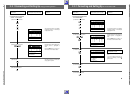
1. Resorting TV stations
a) Select a programme position
S
or
A
,
b) Mark the programme position
“
STORE
c) Select a new programme position
S
or
A
,
d) Store the TV station
“
STORE
,
e) Confirm the VIDEO Plus+ code
number
“
STORE
,
If you are not satified with the order of
the TV stations, you can change it.
Press the button until the TV pro-
gramme you wish to "move" to another
programme position appears on the TV
screen.
The number of the programme position
flashes in the display of the recorder,
e.g.: »
PROG
I
«.
Press the button until the number of the
"new" programme position appears in
the display of the recorder, e.g.:
»
PROG
I2
«.
The TV station is stored in the new pro-
gramme position, and the other TV sta-
tions are shifted over one position.
If you wish to sort further TV stations,
repeat this procedure.
Changing and Adding Programme Positions
This chapter will tell you how to ...
… change the order of the programme positions
(see point 1);
… enter the station identification abbreviations (see point 2);
… finetune the picture, if it is necessary
(see point 3);
… delete the data of a programme position (see point 4);
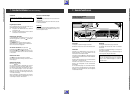
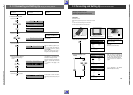
AV/CV
TRACKING
PROGRAM
2
3
1
5
4
8
9
7
0
SAT
6
EW/ED
SET
ɠ
OK
CL
CHECK
AUTO
ļ
Ļ
ON/OFF
TIMER
RECORD
TV
AV
Ǽ
Ļ
ļ
+
–
PROGRAM
ɚ
ɫ
Hi-Fi
COUNT
0000
LP
ɺ
Ǽ
V
S-VHS
ı
RP 33
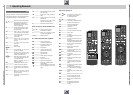
Press these buttons on the
remote control
Ǽ
You will see this in the display
of the recorder Explanations
ŁŁ
… activate the programme position for an external decoder
(see point 5);
… setting a television programme with manual search
(see Point 6);
… setting a television programme by hand (see Point 7).
88 I4:008 I 88:CASS
PROG
SEC PAL
SAT
START
C +
DATE
88 I4:00I2 88:C0 I 5
PROG
SEC PAL
SAT
START
C +
DATE
STOP
VPS
PDC
88 I4:008 I 88:CASS
PROG
SEC PAL
SAT
START
C +
DATE
STOP
88 I4:00I2 88:CASS
PROG
SEC PAL
SAT
START
C +
DATE
8 I2 88:CASS
PROG
SEC PAL
SAT
START
C +
DATE
STOP