SKU 68332 For technical questions, please call 1-800-444-3353 Page: 13
Static Addresses
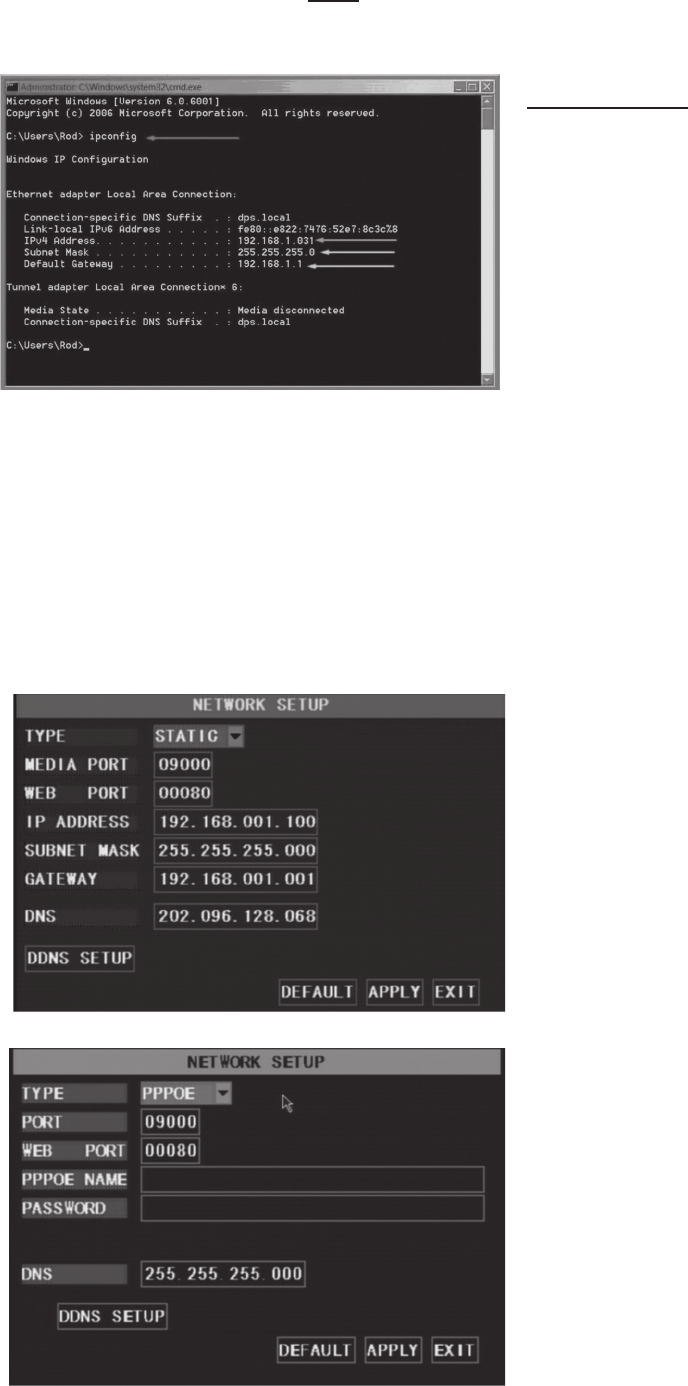
When selecting static allocation, you will need to set up
the network settings on the DVR to match the settings of
the router that you attach to the DVR. To nd the router
settings, working on a PC computer attached to the same
router as the DVR, go to START (lower left of screen),
click Run, type “cmd” then ENTER to bring up a command
prompt. Type “ipcong” then ENTER, to access the router
settings. (See image, top left). Write down the gateway
and subnet mask numbers, then close the window.
In the DVR Main Menu, select [NETWORK] to enter
the NETWORK SETUP MENU. Go to TYPE and select
STATIC. For the DVR’s IP address enter the same rst
3 sets of numbers as the router’s gateway and select
a fourth set of numbers that is different than any other
device attached to the same router. If the IP address of
your computer in the ipcong was a single or two digit
number, enter any three digit number. If the computer IP
address ends with a number in the 100s, enter a number
in the 200’s. After you enter the addresses click APPLY.
At the bottom of the NETWORK SETUP window
there is an option to setup the DVR to be accessed
through a DDNS service. When you click on the DDNS
button it brings up the window displayed as shown
bottom left. You can access the DVR through a static
or dynamic IP address; however a dynamic address
can change from time to time. How often depends
on your service provider. When it changes you need
to nd out what the new IP address is and re-enter
it. To avoid this, get a static IP address from your
service provider so that you do not have to re-enter the
address when it changes. Another solution would to
use a dynamic domain name service to get a domain
name that can be linked to your dynamic address.
There are services that allow you to get a domain name,
user name, and password. You can then enter Your
dynamic domain name into an Internet Explorer browser
instead of an IP address and be directed to whatever
the current dynamic IP address is, so that you can
always access the DVR by entering the same address.
Note: To save changes, you must press APPLY.
