


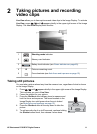

3. Hold the Shutter button halfway down and re-
frame.
4. Press the Shutter button all the way down to take
the picture.
Optimizing exposure
When you press the Shutter button halfway down, the camera also measures the light
level to set the proper exposure. If the camera determines the scene will require a very
long exposure, a shaking hand icon (
) appears. The camera will take the picture, but
it may be blurry because it is difficult to hold the camera still for the length of time required.
Try one of the following:
● Set the flash to Auto Flash or Flash On (see Setting the flash on page 15).
● Set the camera on a tripod or stable surface.
● Turn on more light.
Other recommendations
If an image does not appear to be in proper focus or exposure when you review it in
Playback, use Image Advice (see Image Advice under Using the Playback Menu
on page 25) to help you determine how to correct the problem for similar images in
the future. If you can retake an image, you can follow the suggestions in Image
Advice to improve the image you capture.
Because focus and exposure are crucial to good images, you might find these other
topics useful:
● Topics on blurry, dark, light, or grainy images in Troubleshooting on page 41
● Using the focus range settings on page 14
● Auto Focus Area and AE Metering under Using the Capture Menu on page 18
● Exposure Compensation on page 22
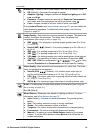
Using the focus range settings
To select a focus range setting, press , use to highlight the desired focus range,
then press
.
Normal Focus (Default)—Use when taking pictures of subjects greater than
500 mm (20 in) away.
Macro—Use when taking close-up pictures of subjects between 100 mm and
1 m (4.7 to 39.4 in) away.
Auto Macro—Use when you are not sure if the subject is in the Macro or
Normal focus range.
Infinity—Use when taking pictures of distant objects and landscapes.
Chapter 2
14