


4
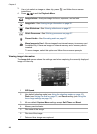
Using the Design Gallery Menu
You can use the Design Gallery features to enhance your captured images.
1.
While in Playback, use
to scroll to an image, then press .
2. Use
to highlight the Design Gallery Menu tab.
3.
Use
to highlight an option, then press and follow the on-screen instructions.
Apply Artistic Effects—See Applying artistic effects on page 29.
Modify Color—See Modifying colors on page 30.
Add Borders—See Adding borders on page 30.
Remove Red Eyes—See Removing red eyes on page 31.
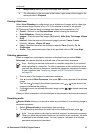
Rotate—Rotates the displayed image. Use to rotate the image clockwise
or counter-clockwise in 90-degree increments. Press
to save the image
in the new orientation.
Crop—See Cropping images on page 31.
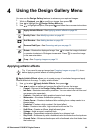
Applying artistic effects
Tip If you need to crop an image (see Cropping images on page 31), do so
before applying artistic effects or adding borders.
Apply Artistic Effects allows you to create a copy of a selected image and apply
creative effects to the copy. To apply artistic effects:
1.
Use
to select Apply Artistic Effects, then press .
2.
Use
to select an option and preview the effect it has on the image.
– Cancel—Returns to the Design Gallery Menu without saving changes.
– Ink Dots—Simulates monocolor pointillism. You can select one ink color and
one paper color separately.
– Cartoon—Simulates a highly-graphical comic book image.
– Watercolor—Simulates a watercolor painting.
– Center Focus—Creates a feathered blur radiating from a sharp center to a
blurred edge.
– Posterize—Creates a high-contrast, flat-toned effect.
– Retro—Creates a two-color, high-contrast look from the 70s.
– Soft Glow—Creates a diffuse, bright ethereal glow.
– Vintage—Adds an aged, scratched look.
– Slimming—Compresses centered subjects for a slimmer look.
– Sky Color—Enhances sky with a feathered color that fades from the top down.
– Ground Color—Enhances landscapes with a feathered color that fades from
the bottom up.
HP Photosmart R725/R727 Digital Camera 29