


3. Highlight Share Menu Setup..., then press
. Connect the camera to your computer using
the USB cable that came with your camera. Follow
the instructions in the Share dialog box to set up
destinations in your camera.
4. Disconnect the camera from the computer, then
press
to verify that the new destinations are now
in the camera.
Sending individual images to online destinations
1. Turn on the camera, then press .
2.
Use
to highlight the first destination.
3. Use
to select a still image that you want to send,
then press
to select it. A appears over the
destination in the Photosmart Express Menu. To
deselect the destination, press
again.
4.
Use
to highlight the next destination, then
press
. Repeat Step 3 to continue selecting
images to send.
5. To exit the Photosmart Express Menu, press
.
6. Connect the camera to your computer using the USB cable that came with your
camera. The images are automatically sent to their destinations.
Selecting individual images for printing
1. Turn on the camera, then press .
2.
Use
to highlight Print.
3. Use
to display an image you want to mark for
printing, then press
to display the Print sub-
menu.
4.
Use
to specify the number of copies to print
(up to 99), then press
. To deselect Print, select
Print again, set the number of copies to 0, then
press
.
5. To select additional images to mark for printing,
use
to display an image, press , and repeat
Step 4.
6.
To exit the Photosmart Express Menu, press
.
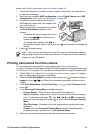
7. Connect the camera to a PictBridge-certified printer using the USB cable that came
with your camera. The images you selected are automatically printed.
Sending all images to a printer or online destinations
1. Turn on the camera, then press .
2.
Use
to highlight Share All Images..., then press .
HP Photosmart R725/R727 Digital Camera 37