


is displayed, you can stitch the sequence by pressing , then pressing when the
stitched panorama appears. You can also delete the panoramic sequence by pressing
, selecting Entire Panoramic Sequence, then pressing .
Note To add audio to images taken in Panorama mode, see Recording audio
on page 27.
Using the Capture Menu
The Capture Menu allows you to adjust camera settings that affect the characteristics
of the images and video clips you capture.
1.
While in Live View, press
to display the Capture Menu.
2.
Use
to highlight a menu option, then press to display the menu option’s
sub-menu.
3.
Use
to highlight a setting, then press .
4.
Press
to exit the Capture Menu.
For on-camera information about an option, use
to highlight Help... in the option's
sub-menu, then press
.
Shooting Modes—For selecting a shooting mode. For information about
shooting modes and another way to select them, see Using the shooting
modes on page 16.
Self-Timer—For capturing images or recording video after a 10-second delay
(see Using the Self-Timer settings on page 21).
● Off (Default)—Disables Self-Timer.
● On—For taking one shot or video clip.
● On - 2 Shots—For taking two shots or one video clip.
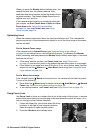
Red-Eye Removal—For automatically removing red eyes when flash is set
to Auto or Flash On and the camera detects red eyes. For information about
red eyes, see Red eye on page 16.
On, Off (Default)
Exposure Compensation—Overrides the camera’s automatic exposure
setting. For more information, see Exposure Compensation on page 22.
● To make the images you are about to capture brighter, press
to increase
the value.
● To make the images you are about to capture darker, press
to decrease
the value.
Adaptive Lighting—Balances the relationship between light and dark areas.
For more information, see Adaptive Lighting on page 22.
● Off (Default)—Processes the image as normal.
● Low—Gently brightens dark regions.
● High—Greatly brightens dark regions.
Chapter 2
18